Please always check the instructions on your seed packets as varieties can vary. Your location, the weather, soil condition and other factors can also determine failure or success, which need to be considered.
Our how to grow guide is a basic beginner's 'go-to' based on our own experiences. Many use a range of methods that may differ to ours. It's amazing what tips and tricks you can learn from 'veteran' growers once you make acquaintance with your neighbouring plots!
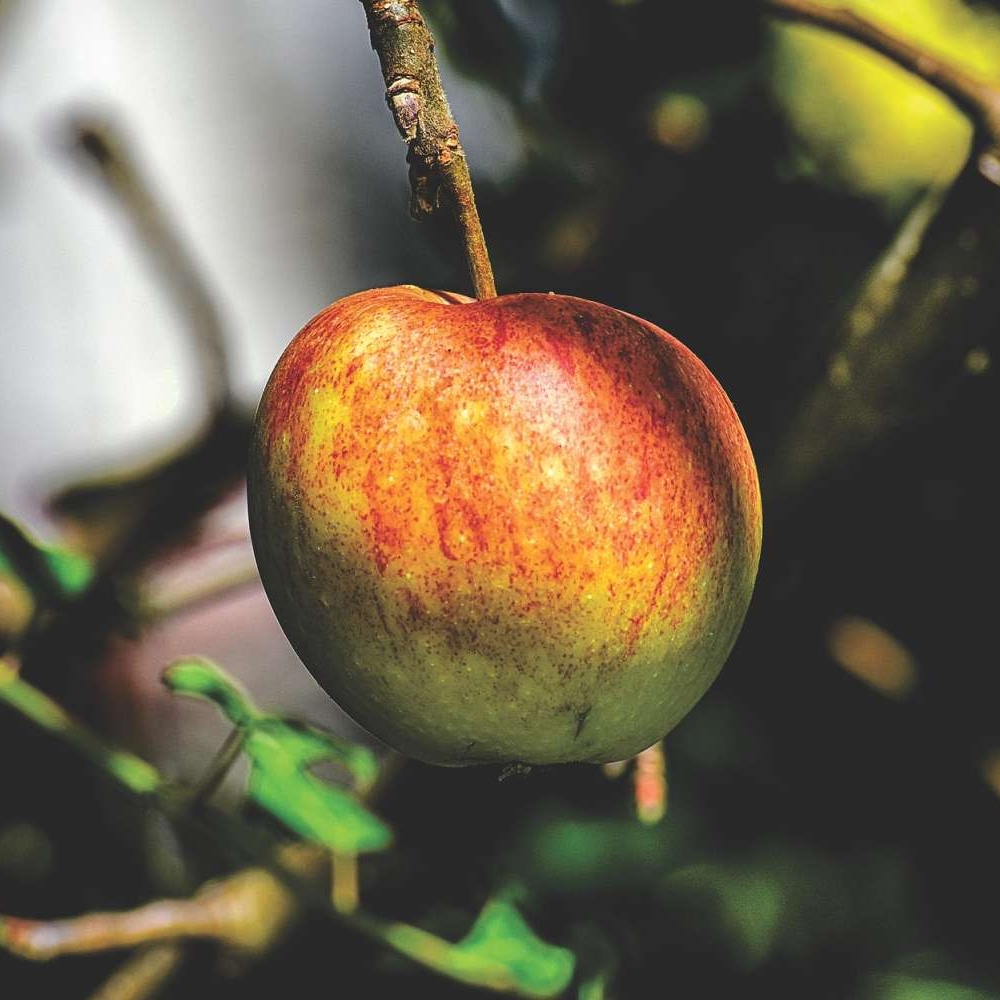
Would a plot be a plot without an apple tree? They're easy to grow and once established, will give you plenty of fruits for many years to come. It can be better to grow more than one for pollination, however don't forget how big they can get and will start to shade areas surrounding it so some careful planning as to where on your plot to plant needs to be considered. In general, one tree still does very well!
The best time to plant is in the autumn from about November time with fruits coming late summer to early autumn for harvesting. You may need to prune your tree regularly to help keep it healthy and productive.
As you will know there are many varieties of apple, choose the most suitable one for your location and weather, soil and your taste!

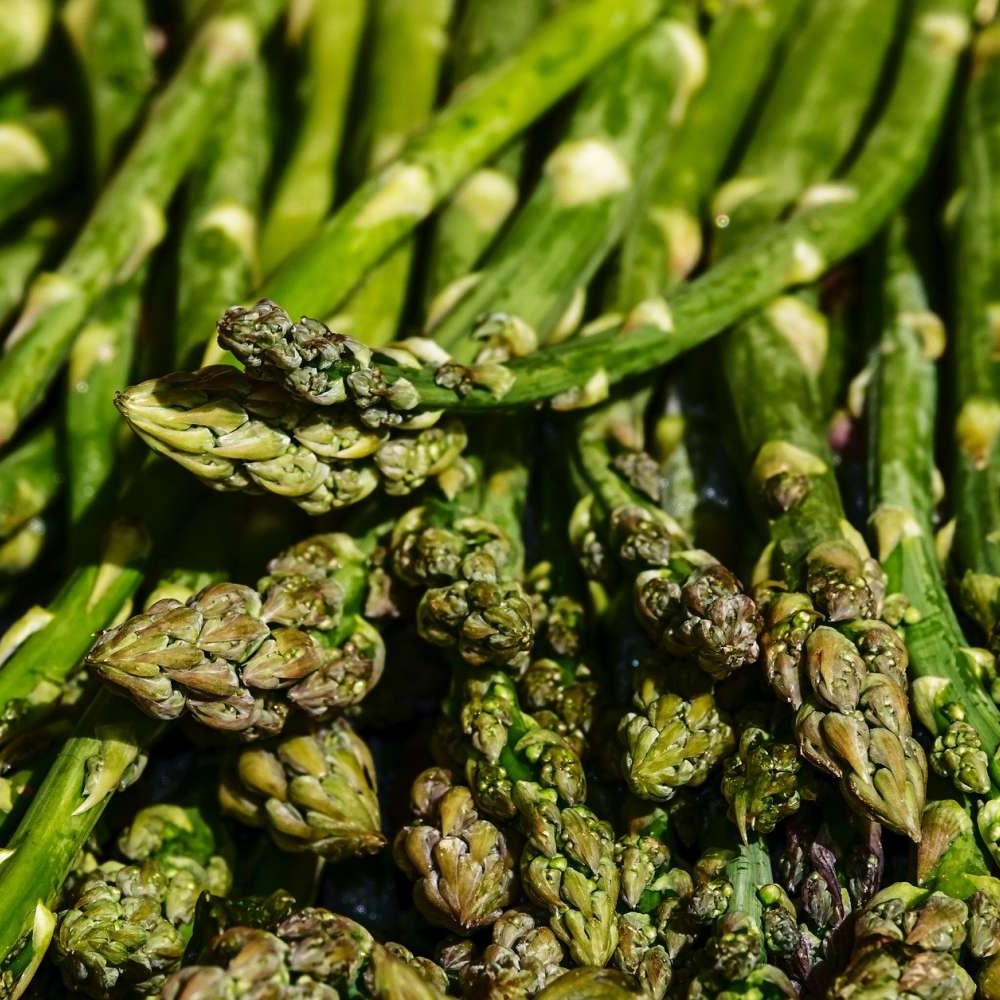
Asparagus can be grown by seed but may be better if they are planted as dormant year old crowns during March-April. There are male and female varieties and the males grow better spears than the females and there will be more of them. The female ones grow orange berries on so they are easily distinguishable.
Keep watered during dry weather and also weed-free; weeding is best to be done by hand because the roots of asparagus can be shallow and easily broken.
As the plants grow tall, and wispy during the summer, they may require the support of canes or fencing.
During autumn, the foliage will turn yellow and after this has happened, cut down to ground level for over the winter. You won't be harvesting during the first year and only a small amount the second with an increase in the third and so on. Allow the plants to establish and grow a plentiful crop.
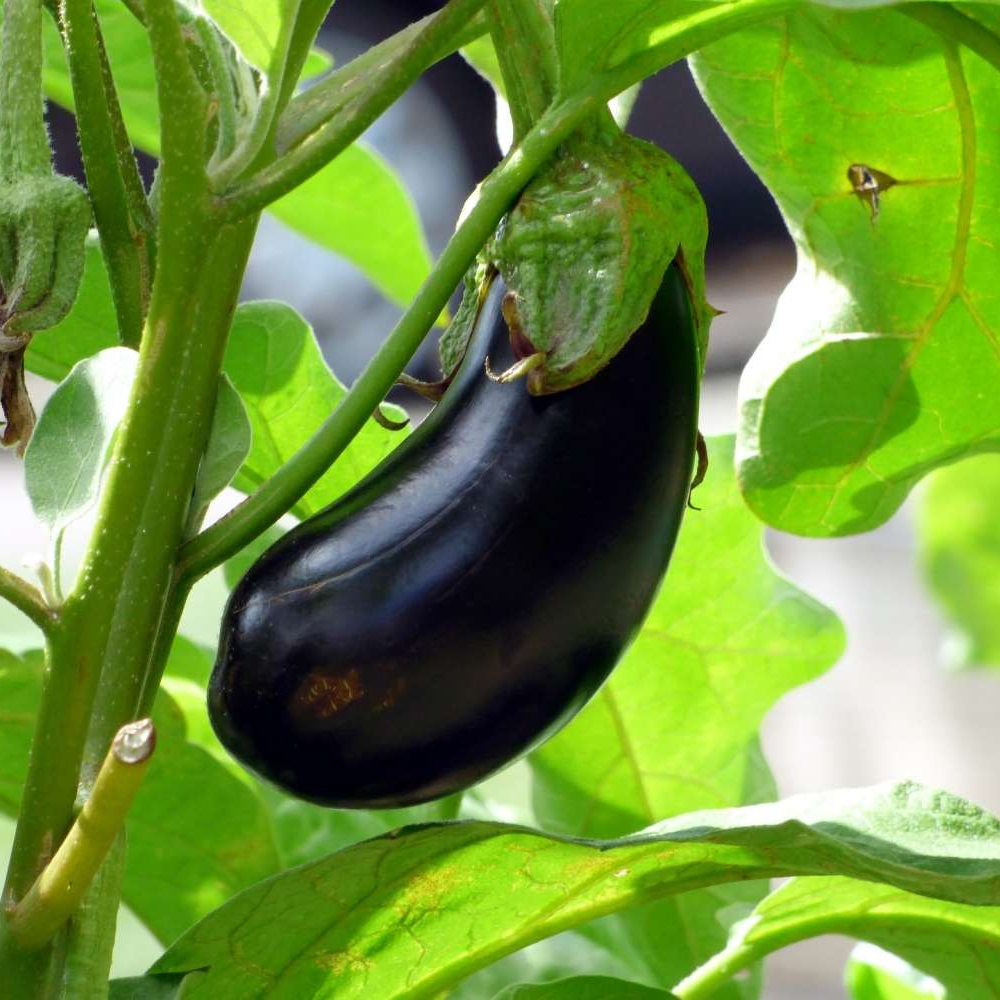
Aubergines need to be sown as early in the year as possible but preferably with heat such as a heated propagator due to slow growth. They do get going eventually so if you have small plants for some time, don't give up on them - this is normal.
Aubergines do best indoors, preferably in a sunny and warm greenhouse and can be transferred to pots once it is established. They love the warmth and moisture and will also require support for their heavy foliage and fruit.
Aubergines are ready when their skin has a sheen and is approx 6 inches in size. Regularly collect by cutting off at the stem to encourage regrowth. They are usually ready to harvest in August onwards.
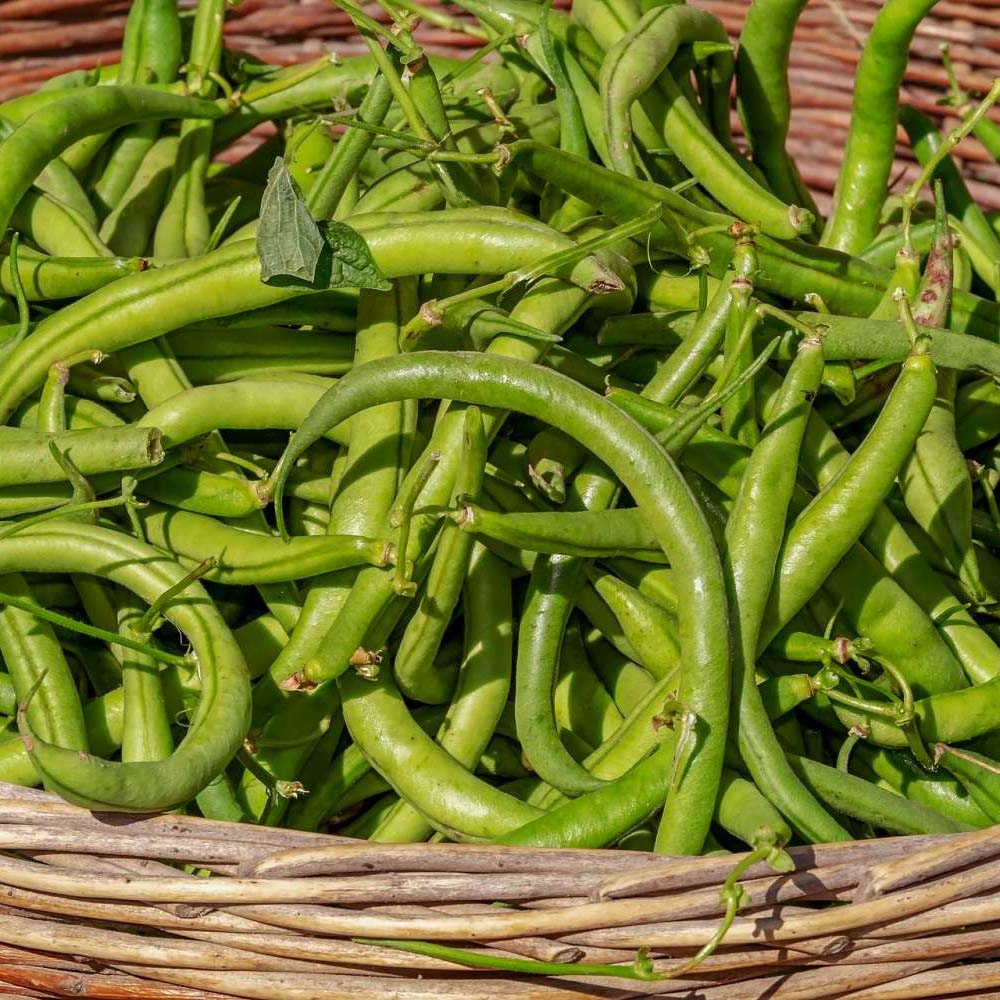
Pretty similar to peas, we like to grow dwarf beans and so we basically use the same method - two bean seeds sown apart in the same hole with a cane for support during Spring. Beans are a particularly thirsty plant so they do need plenty of water. One trick is to take an empty plastic bottle and cut it in half. Use the cap end and plant into the soil near your plants to help funnel the water directly to the roots.
Like peas, when the beans have formed and grown, keep harvesting them to encourage regrowth. You can freeze the beans also. You can usually get a good dozen beans at least from one plant at a time. The plant will die off when it is spent.
Runner beans need a lot more preparation for their growth. The foliage trails are long and get very heavy so a good supporting structure is required. Your structure also needs to stand sturdy in the wind! We usually use long canes and secure them into a 'tippee' type structure with our seeds planted next to each pole that sits in the ground. More commonly, growers tend to build a line of canes going vertically; two opposite each other, repeated, then attached to a long horizontal cane along the top. They can be magnificent to see, with their beautiful orange flowers before they fruit.
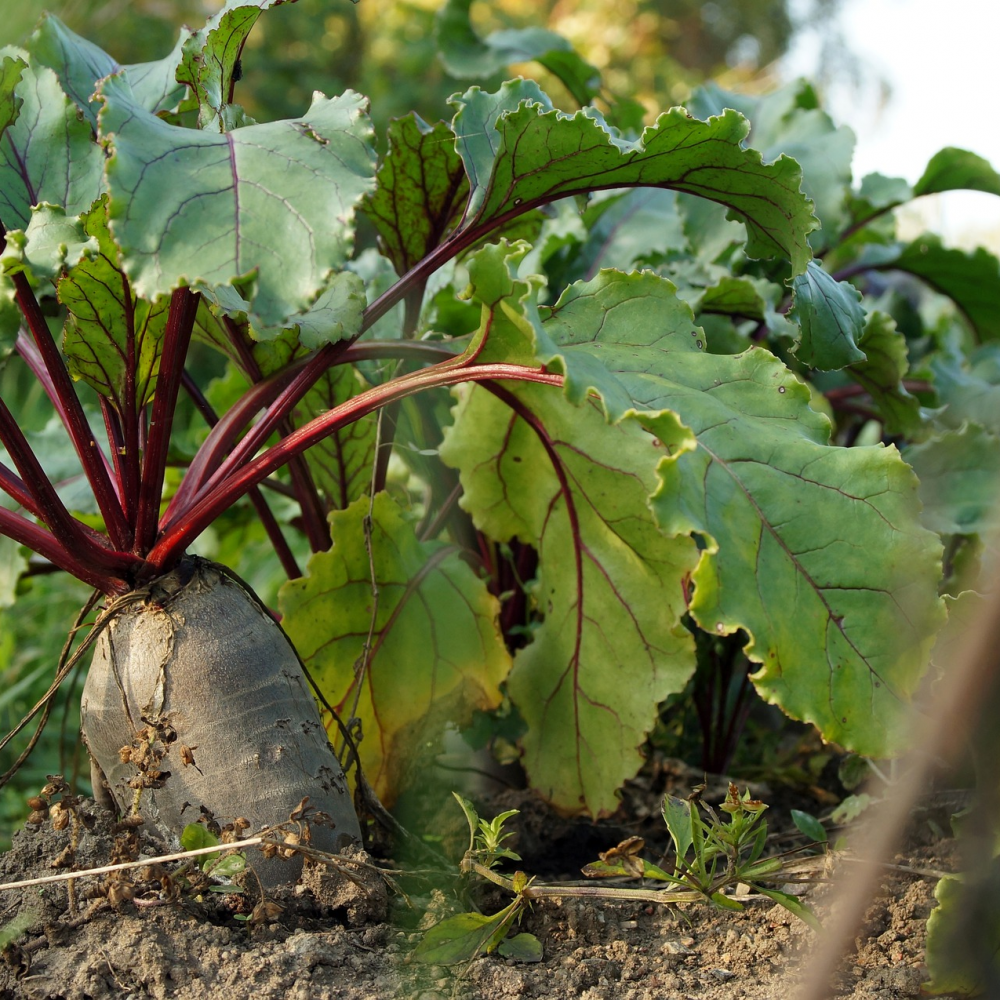
Beetroots are an easy and versatile vegetable to grow, we sow ours directly into the ground from Springtime onwards (around the middle of April). You can stagger your sowing until early summer (July time) so that you get a line of crops throughout the year. They are also easy to store too!
Sow your seeds in lines, about an inch deep and a few inches apart. Keep watered during dry spells and weed-free; thinning out as you go when required.
You can harvest some, leaving others in the ground to grow bigger. It's up to you when and how big, biggest being about the size of an orange.
You can pickle them or simply cook and eat them as they are for more of an earthy flavour. We boil ours, remove the skin, allow to cool and freeze.
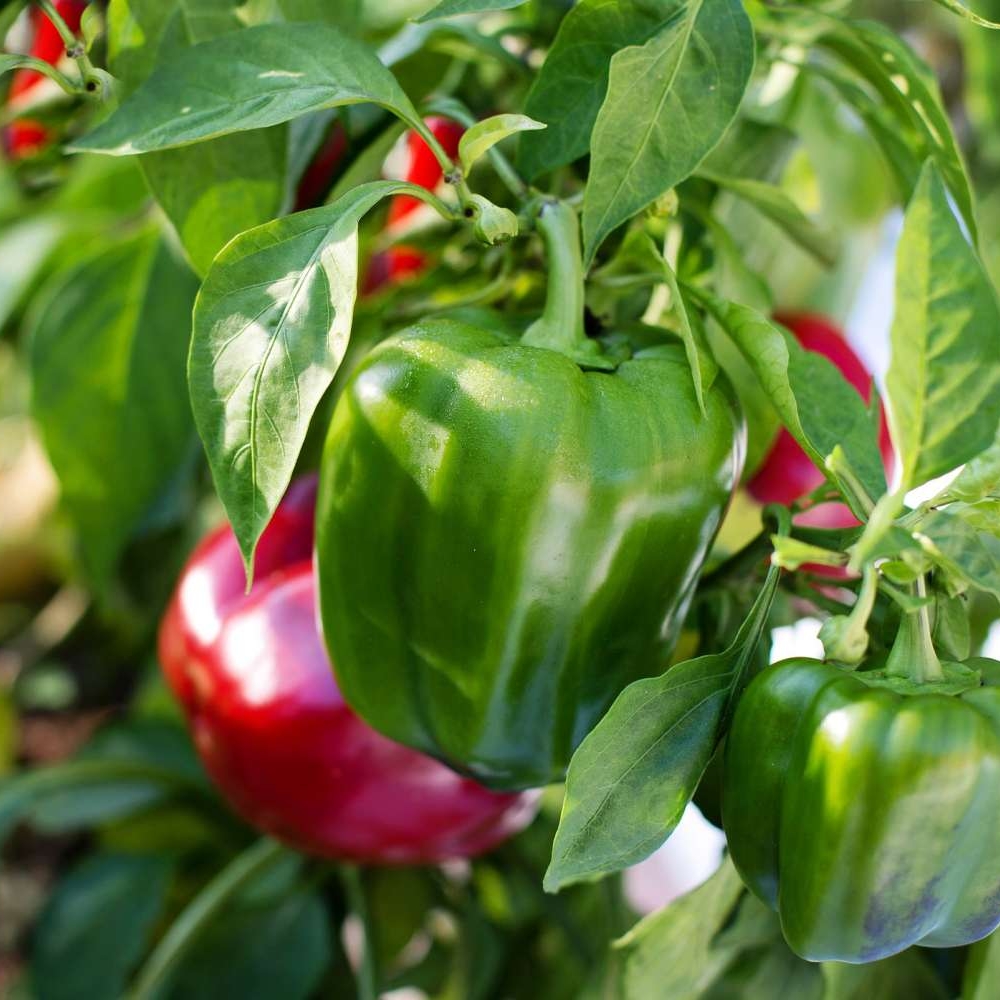
Like chilli peppers, these can be sown from seed or from young plants but they do like the warmer climes and grow best in a greenhouse if you're not in a sunny, more southern location. You can start your seeds off in a propagator during spring and move outdoors late May. If you have a greenhouse then you can move them a bit earlier.
You can pinch out the tops to help the plant plump up and become bushy, keeping it watered and fed. The fruits will grow to a large fist size with a shiny outer skin. You can leave to ripen red or pick younger when it's green dependent on your taste, do pick when they're ready. Peppers are great for sourcing seeds for the next season when preparing to cook, keep them to one side and then you can wash them, removing the pulp and dry them out and store.
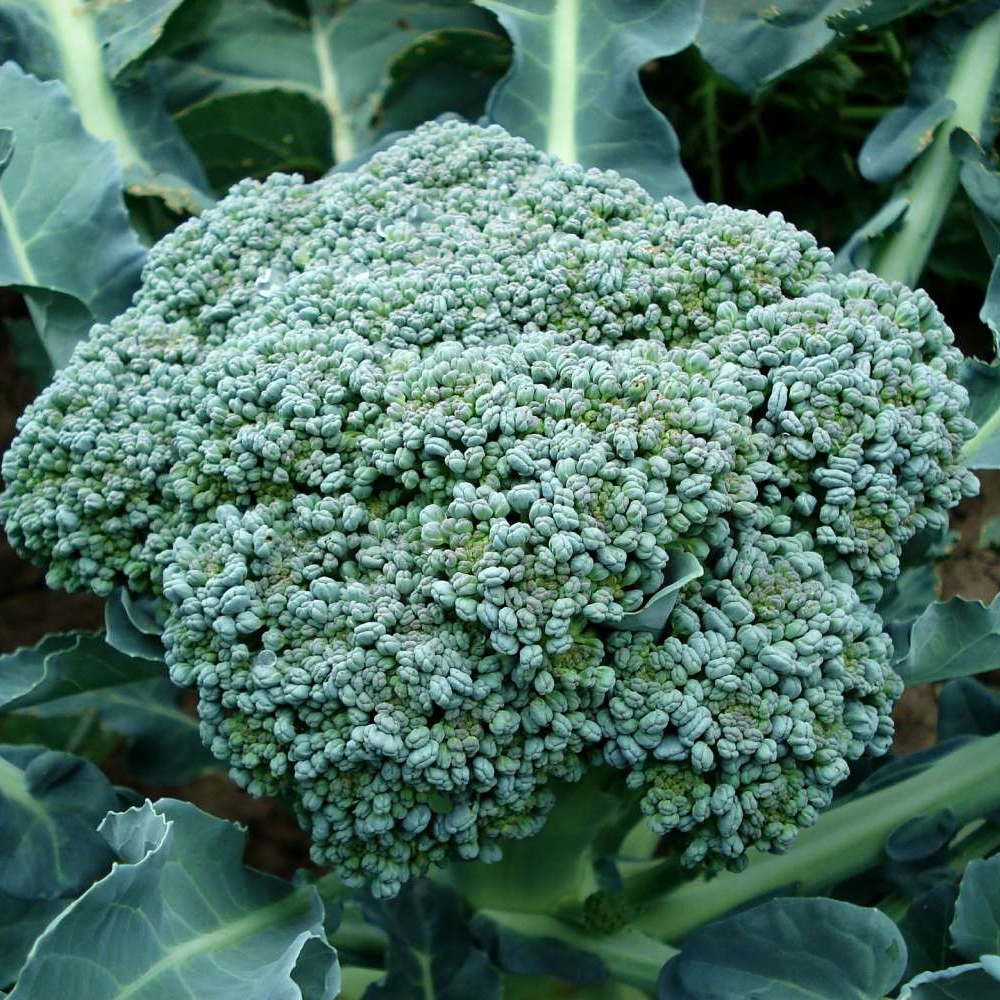
Alike our other brassicas, we like to sow in trays indoors and plant out during spring. You can sow outside from April onwards, taking into account your local climate. Always check your seed packed for further instructions as varieties may vary. Broccoli also known as Calabrese can be green, purple or white florets.
Plant out allowing plenty of room for growth, like cauliflowers and cabbages, their foliage can take up a fair amount of room. Plant in good, fertile soil, keeping watered during dry spells and weed-free. Netting is a good idea, especially when the heads start to grow because birds like them too!
Similar to the other brassica vegetables, once the head (florets) appear they can grow quickly and flower, leaving it too late. To harvest cut the stem when you have a formed floret before the flowers emerge. Going to seed (bolting) can be quicker when it's particularly warm.
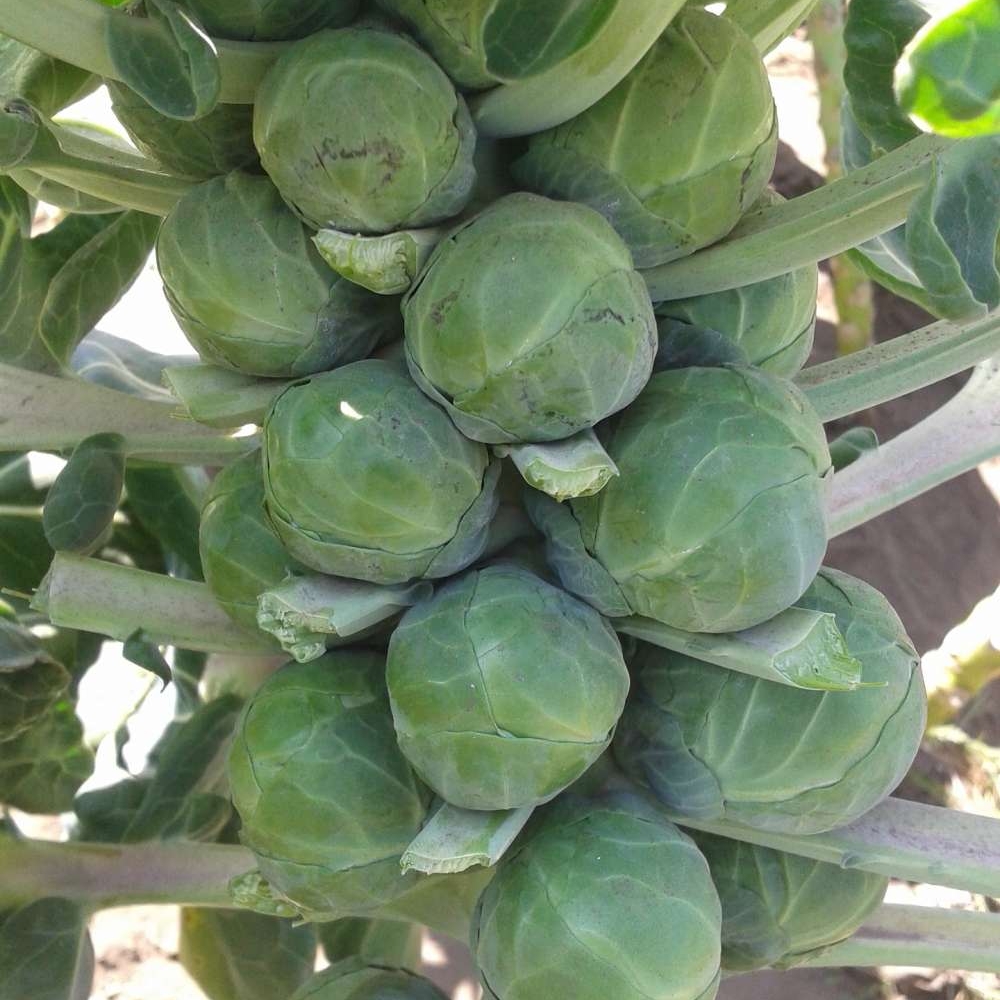
We have always found brussels sprouts easy to grow and usually start off the sowing in spring, in pots or trays indoors. You can thin out your seedlings once established and before planting out once more established early summer - around early June time.
The plants grow quite tall and have large leaves, so find a spacious, sunny spot that also offers a bit of shelter against strong winds. We have found them to be pretty versatile soil wise, keep watered during dry weather and weed-free.
As the stems grow taller and thicker, you may want to mound up around the base to offer them more support. Netting is also advised.
Brussels should be harvested from the bottom ones upwards by snapping them off in a downward direction. Most preferable for a better flavour is to wait until we've had some frosts but can be ready well before this. Sprout tops can also be used at the end of their growing time. Don't forget to save plenty for Christmas dinner!
Please see Squashes.
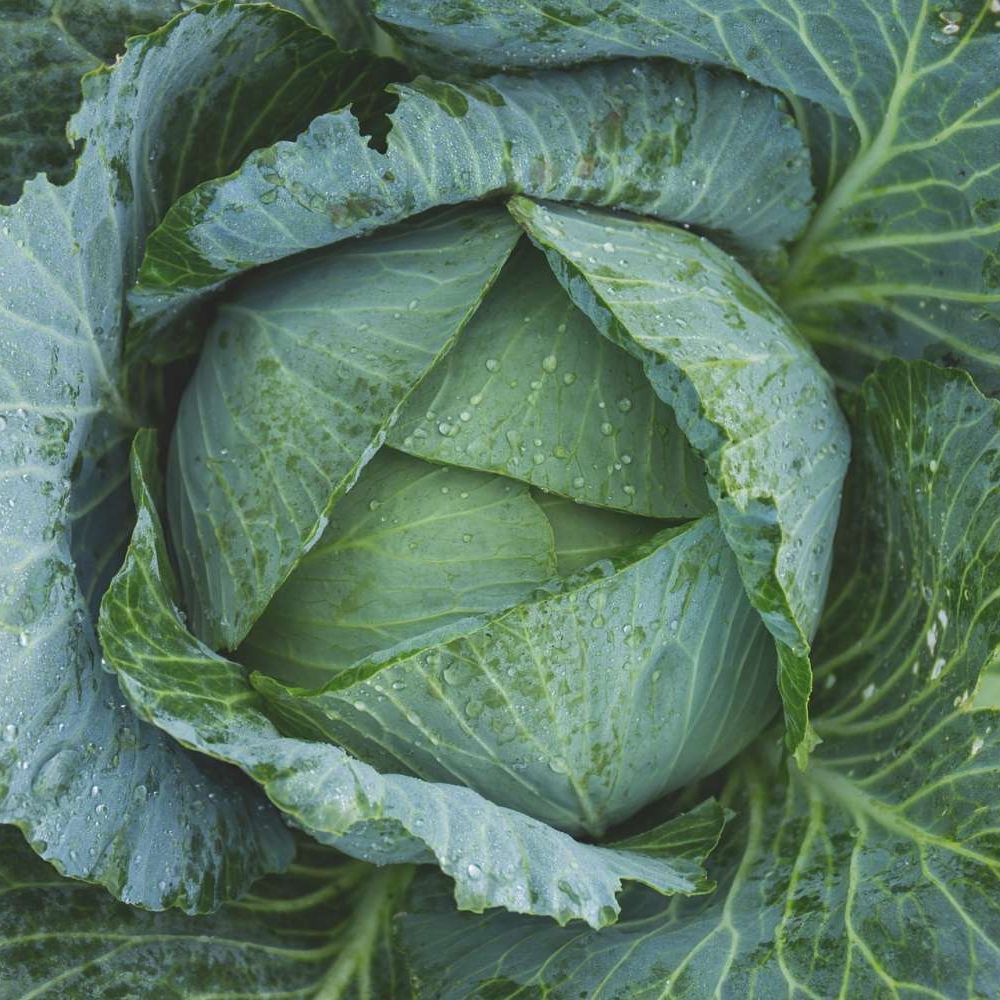
There are many varieties of cabbage that can be sown throughout the season and they are best sown directly into the ground or at least outdoors rather than inside first. However, they do require a fair amount of space so it's worth considering when planning your plot. They are also better off in a different area to where you may have grown them previously. They like a lot of water too but for a more direct instruction, it's best to check the seed packets as different type vary in requirements.
We always cover in netting; as with all of our brassicas and you may also need to factor in unwanted slugs and snails to help combat holey leaves.
Harvesting will obviously vary too, they can be cut off at ground level when you have the size and maturity you are seeking.
Please see Broccoli.
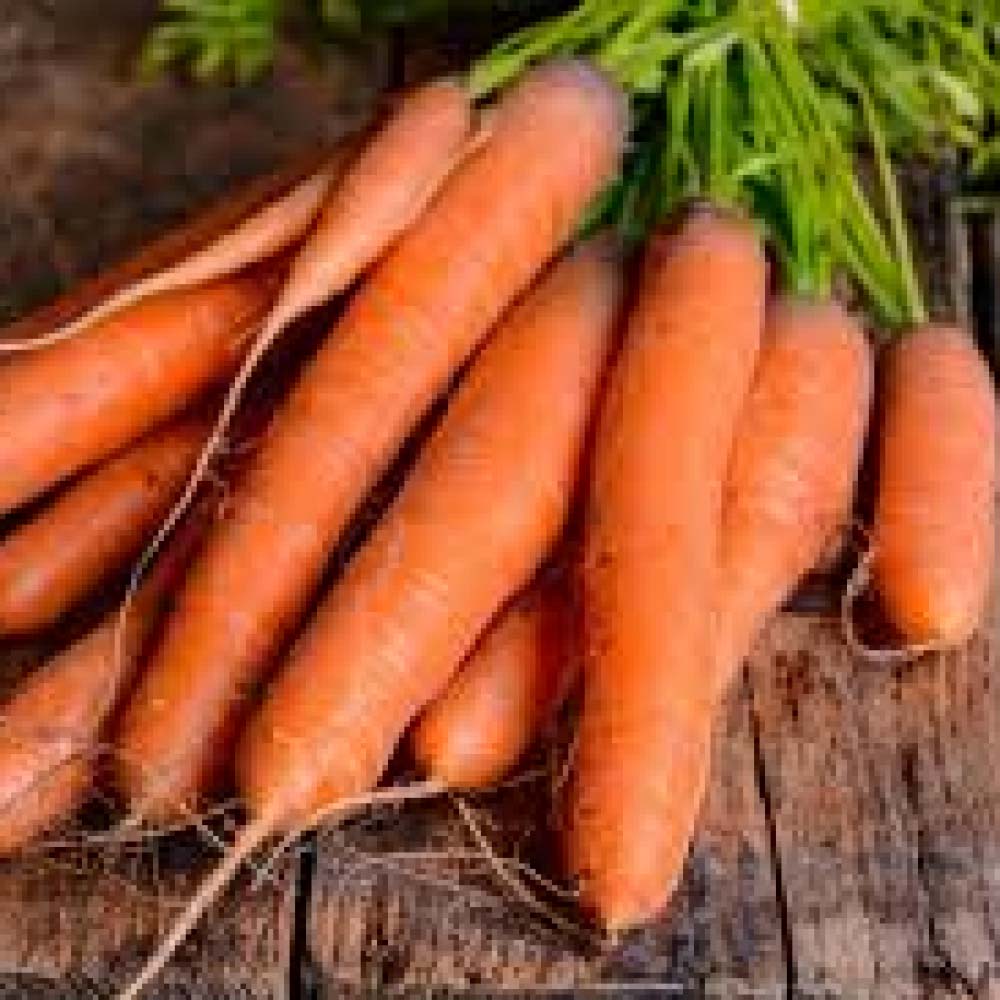
Once you've selected your variety of carrots; checking the time of year that you can sow we recommend that you use good quality compost and dig a trench a few inches deep in a row so that you have good, loose and moist soil for your carrots to grow. Scatter your seeds along the row and cover with a thin layer of more soil.
Water and keep weed free. They should germinate after a couple of weeks and then you may want to thin them out - we find pulling young carrots to provide space makes for a tasty baby carrot to enjoy, while the others grow bigger. It is often said not to thin carrots out as it attracts green fly although we haven't experienced this.
You can stagger your sowing to give you a good ongoing supply.
The foliage grows pretty big and bushy - You'll know when they're ready to pull - Approx 14-16 weeks, you can often see the tops of them in the soil for a size guide. Ensure the soil is moist to prevent breakage when you lift them.
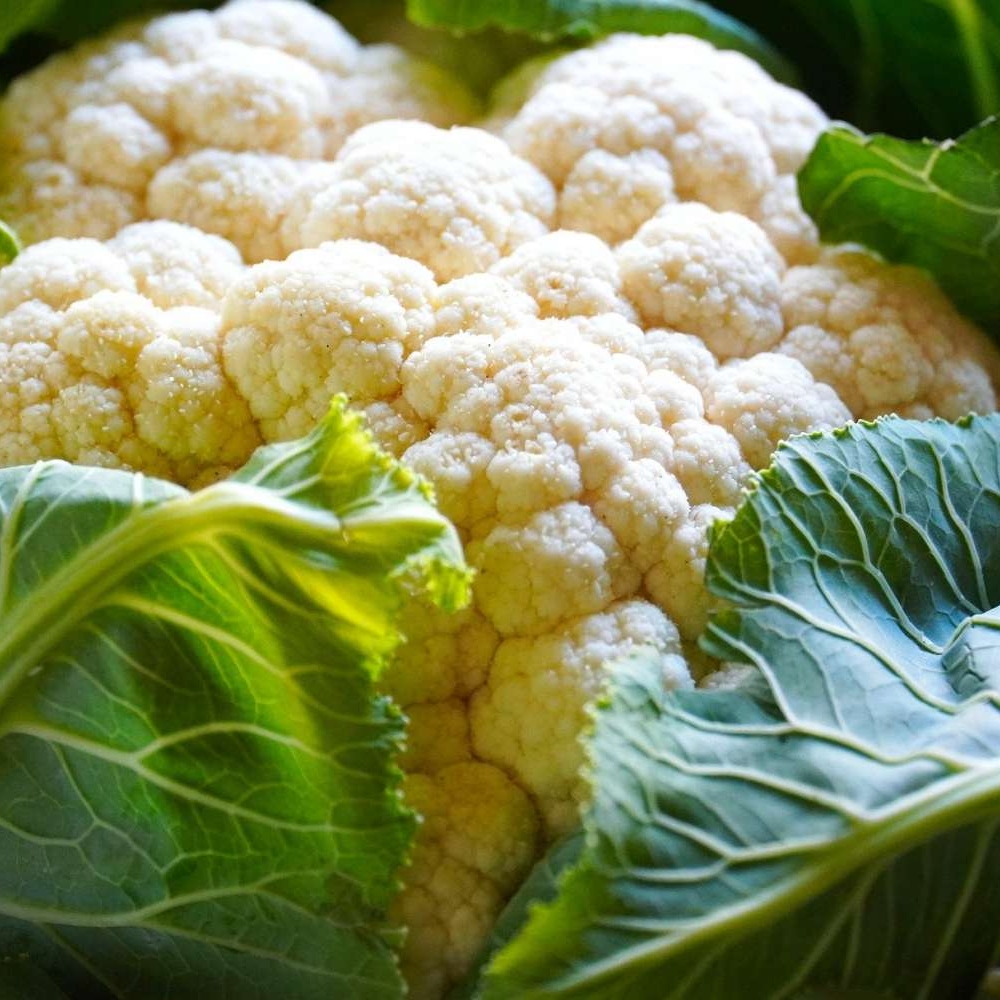
We tend to start our seedlings off in trays, indoors from early Spring. Although you can grow at other times of the year (check your variety and seed packet instructions). They are very delicate in terms of climate; needing just the right temperatures and sunlight. Once matured though, they tend to grow very quickly before bolting so it pays not to sow too many at once (unless you can eat that much cauliflower!)
Plant out during Spring, when the threat of frost has gone in well watered, fertilised and firm soil. It pays to water well before transferring out as well as the ground where you are planting them. Keep weed-free and watered throughout the drier weather giving them plenty of room to grow.
You can harvest once the florets are firm but before they start to separate- keep a close eye because it quickly becomes too late. They can vary in size and colour depending on the variety and when you have sown them; you might get a smaller 'one person' to football size!
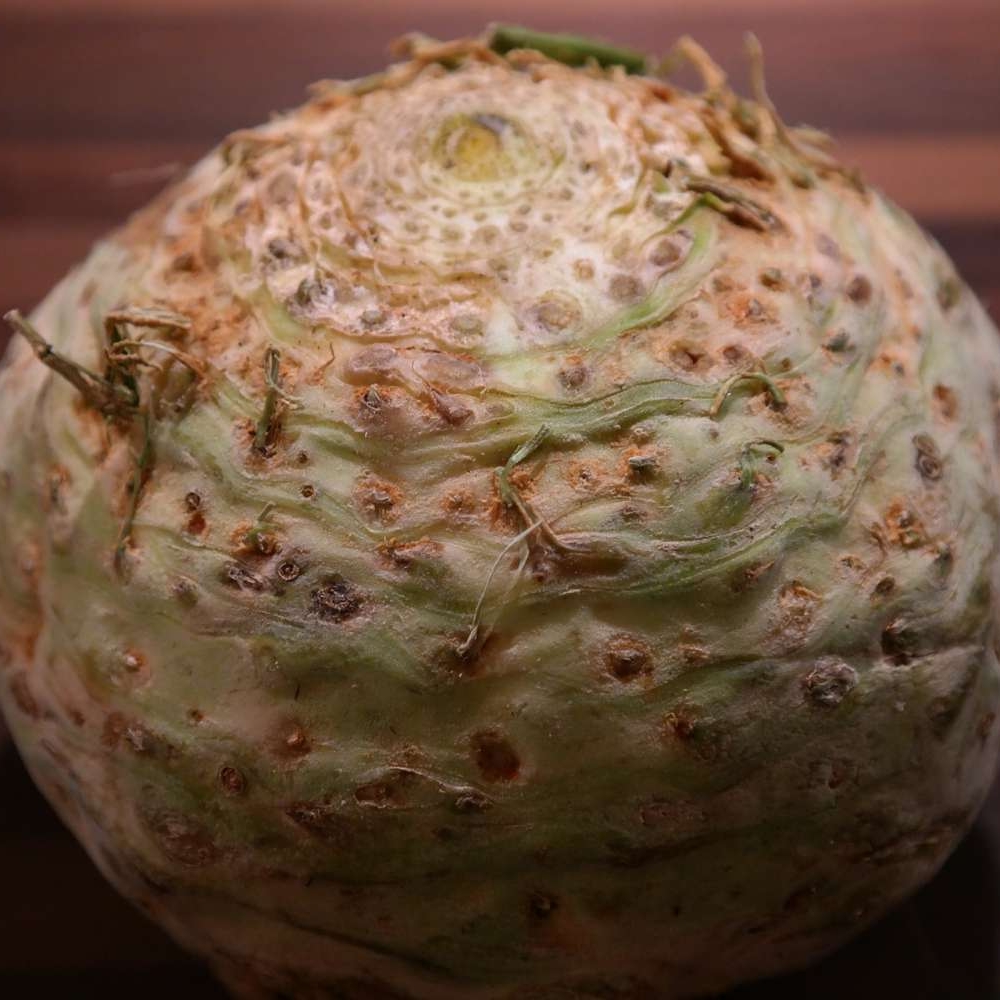
A slow growing winter root vegetable that I have 'grown' to love! Sow in Spring; preferably in a propagator or warm sunny position inside. Germination can be touch and go with a slow start; could be worth doing extra pots of seedlings. The cooler temperatures can cause celeriac to bolt/run to seed later on.
They should only be hardened off and planted out when you have warm temperatures of at least 18c, keeping weed-free and well watered. The soil should not dry out and you may also want to use some mulch to retain moisture. Some add straw into the winter months to prevent the ground from freezing.
The celeriac should be ready to pull from October onwards through until March and you can leave and harvest as required. Early spring, you can lift any that remain and dig over the beds, ridding of old roots.
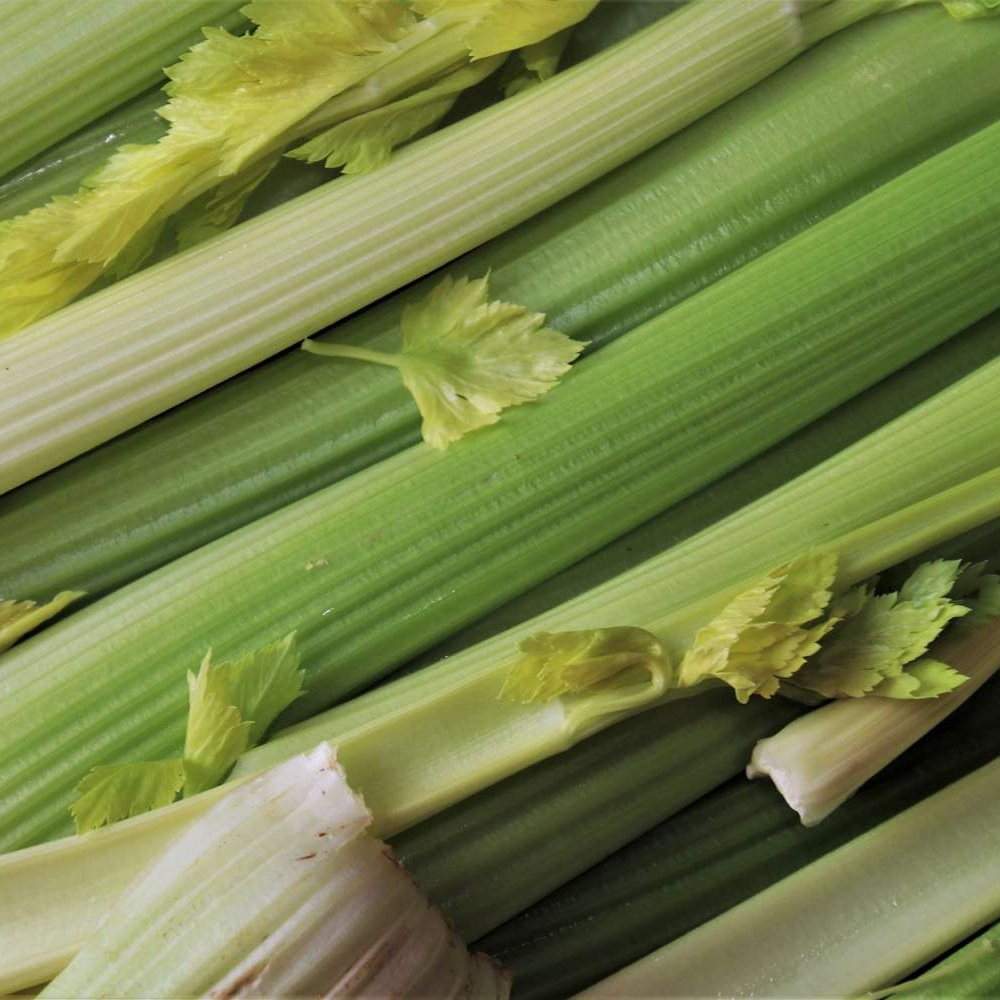
Celery can be started in pots or sown directly from Spring when the threat of frosts and low temperatures have past to help stop them running to seed later on. They can take a while to germinate and for indoor trays, plant out May time. Seeds sown outside can be sown thinly and shallow - do check your seed packet for specifics.
They love plenty of water during growth and should not dry out. They will be ready to cut off at ground level from August onwards well into the autumn; especially if you're in a milder location but celery doesn't like the frosts so do harvest before the temperatures drop again.
Please see Swiss Chard.
Please see Endive.
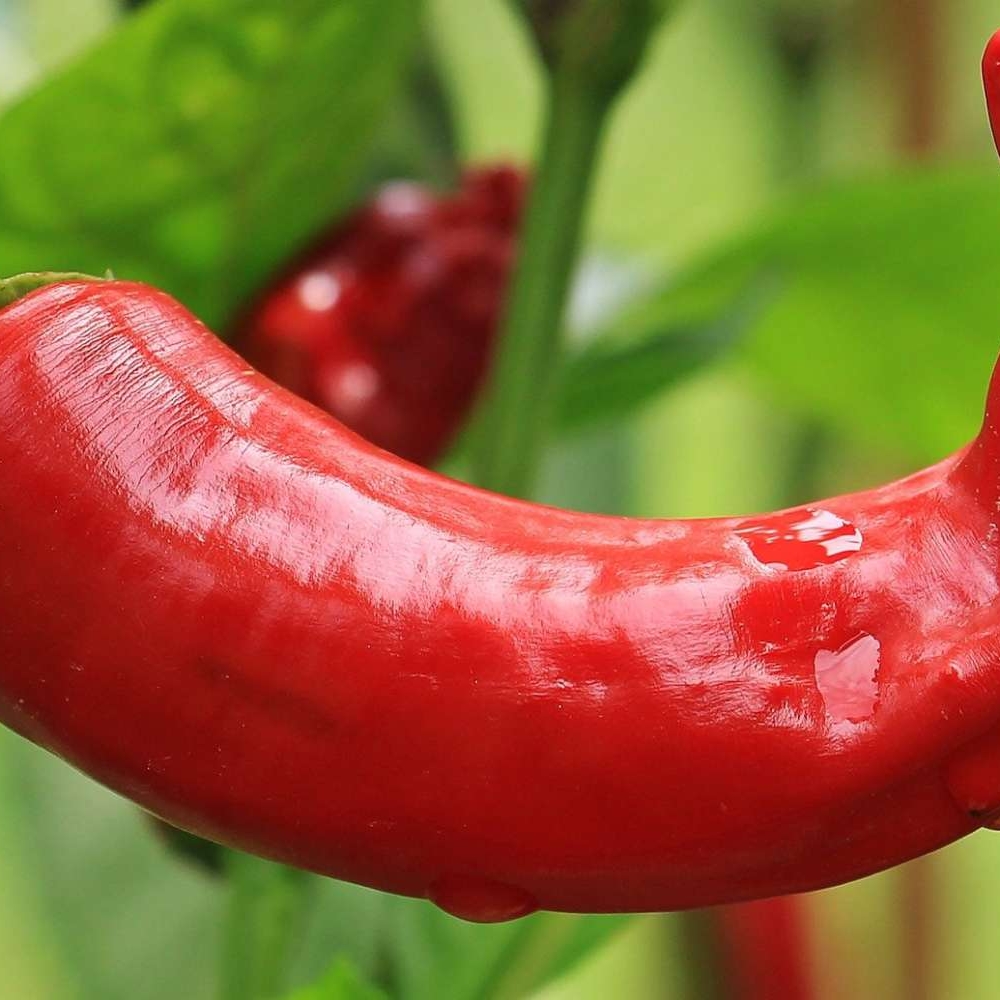
For those that like it hot! Alongside your usual checking of specific instructions for your chosen variety, look at the heat level that your chilli fruits will provide. You can grow chillies from very mild to very fiery!
Best grown in pots, we start ours indoors and sow our seeds kept in a heated propagator until the early summer when temperatures have risen and the threat of frost is far behind us.
We transfer to pots when they're established seedlings, keeping watered and still in a sunny spot - usually on the window sill. You can keep them indoors or transfer outside into a sunny position from late May onwards. You may need to transfer again to a grow bag or larger pot and the plants may also require a small cane (like you might use for tomato or pea plants). Pinch out the tops of the plants when they are approx 12 inches high.
Your chilli pepper plants will flower and then form the chilli peppers, the chillies should be picked regularly once sizeable to encourage further growth. However, when left they will turn ripen from green to red giving a fuller flavour and are also great for drying. Dependent on your tastes and use of your chillies, you will need to decide which to do or a balance of both.
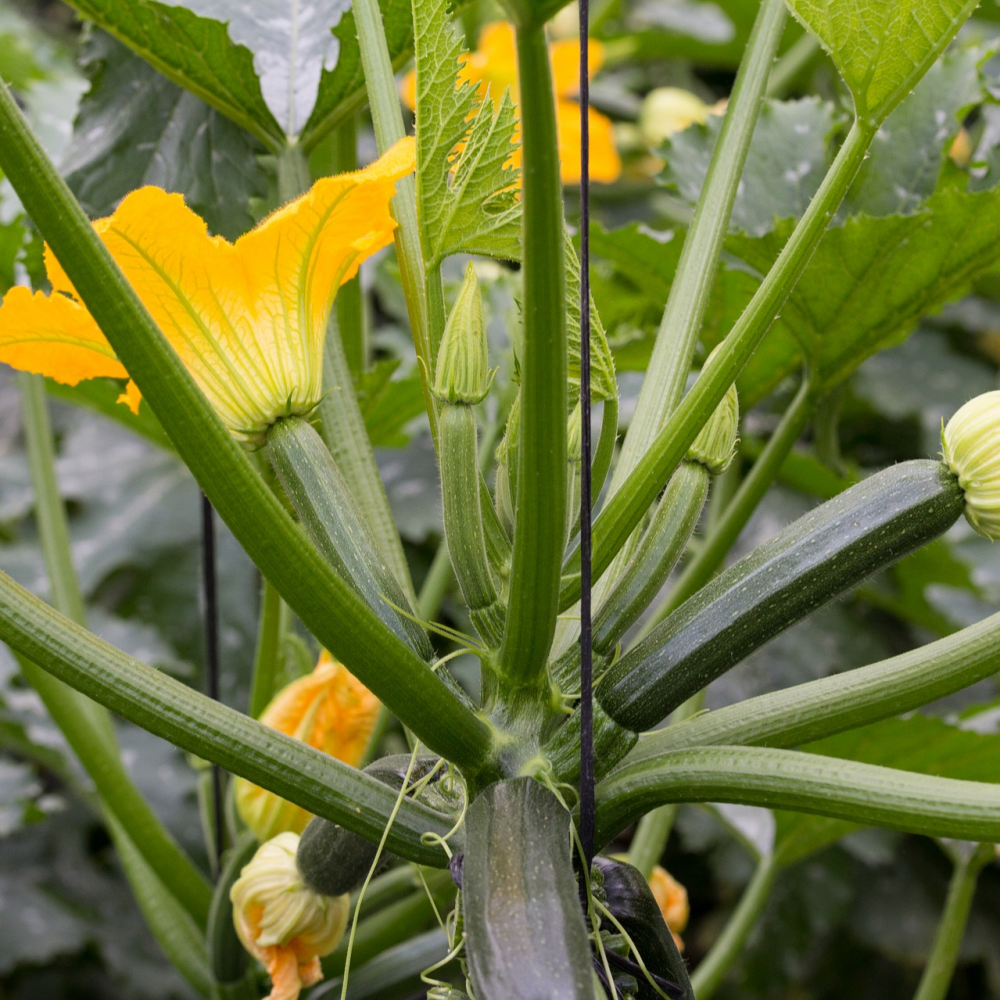
We can't help but smile when we think about growing courgettes - if you're new to growing you will soon learn how easy and plentiful they are! It's a common theme for growers to be asking for ideas on what to do with them all, so be mindful when planting - maybe stick to one or two plants unless you love lots of them!
We usually plant the seeds directly into the soil in a sunny spot, allowing plenty of room as the foliage does grow pretty large and spread out during late May/early June outdoors (you can sow earlier in pots, indoors and plant out later).
Keep watered and weed-free, courgette plants are pretty thirsty. You won't have to wait too long before the plants produce beautiful yellow flowers followed by the fruit.
Keep an eye on them, your courgettes are ready for picking at approx 5-6 inches, leave longer for a bigger, fatter one or indeed a marrow. Regular harvesting will encourage a longer crop but you will be surprised at how many and how often you will get a courgette - they seem to grow so fast; practically the minute your back is turned! A great crop for sharing your successes with family, friends and neighbours.
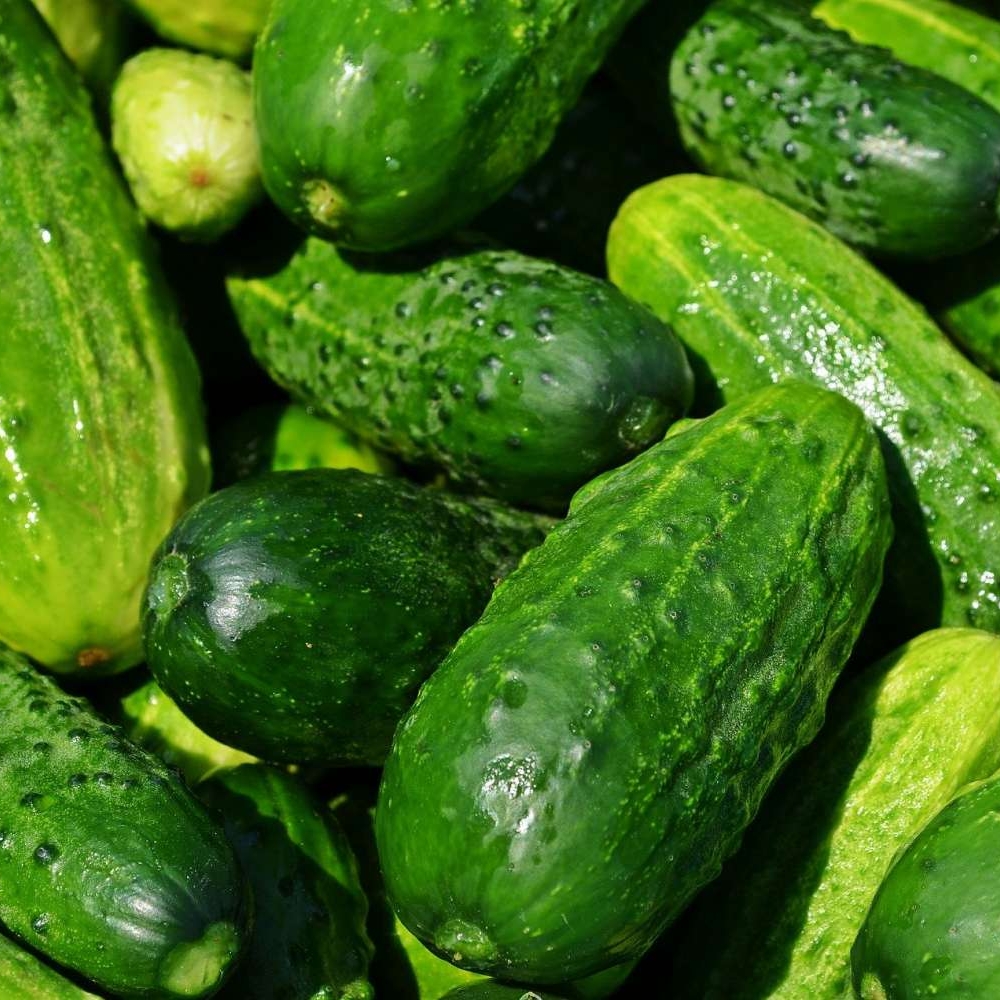
Cucumbers like the warmth and humidity and are usually grown indoors/greenhouse although there are some varieties you can grow outside.
The seeds can be sown from late spring, we have grown in large pots with support for the foliage, which trails and is best to be trained vertically with canes and such like. once the fruits are formed, the weight needs good support and you can remove unneccessary side shoots.
Cucumber plants like a lot of water and humidity. If you can, create lots of moisture in your greenhouse during the summer sun. Ensure the soil is kept well watered and not the plant.
The plant produces yellow flowers; you will be able to identify male and female flowers; the female have very small fruits behind them.
Once your fruit appears, allow to grow until you have your desired cucumber size - approx 15-18cm long and cut off at the stem.
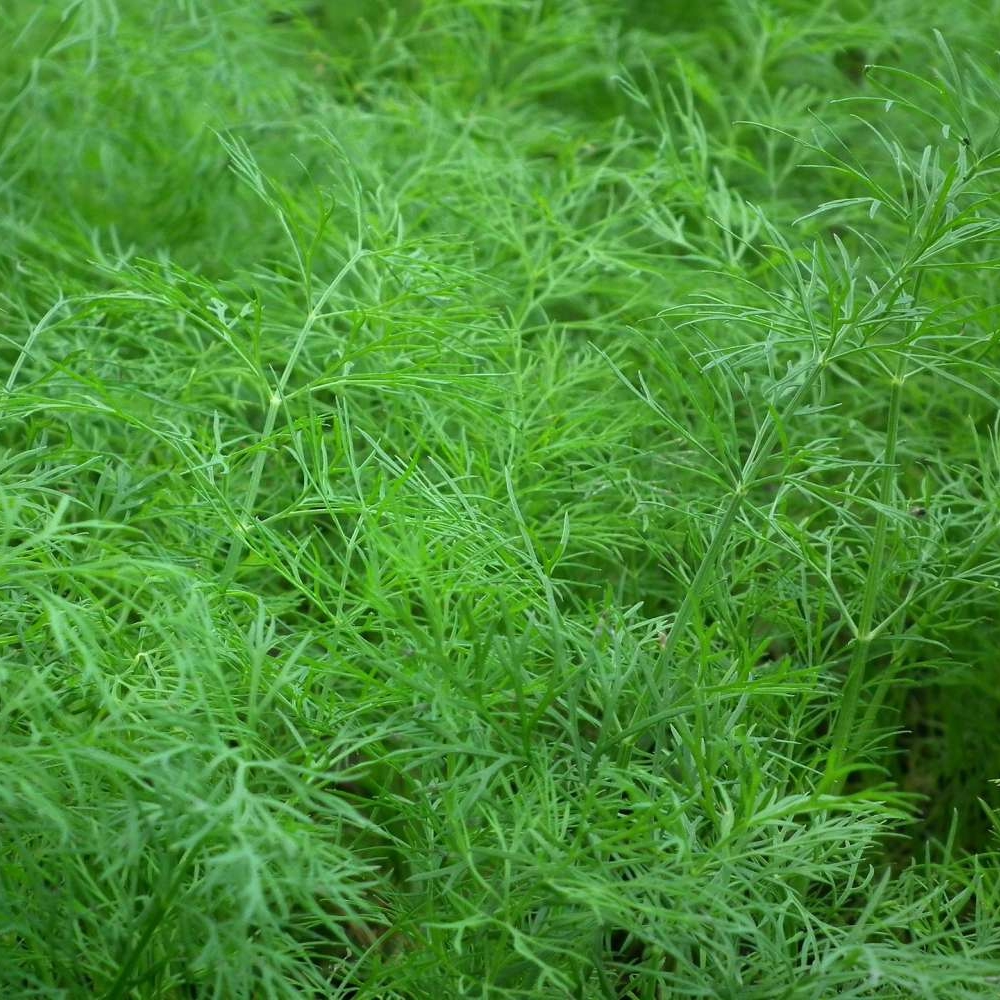
You can sow Dill any time between the middle of spring and mid summer but it's best to start them off where they will grow; whether that be in the ground or in pots as they do not like their roots getting disturbed. Avoid planting near fennel as any potential cross-breeding can result in a poor flavour of seedlings.
Keep the soil moist, watering well in dry weather and also keep weed-free.
You can harvest the leaves as and when, allowing them to dry out and store in a dry container. You can also collect the seeds when they start to go brown.Regular leaf picking will help to encourage re-growth.
Please see Aubergine.
Endive can be sown practically all year but likes the warmer temperatures to germinate and not run to seed later on. If you're planting for an early crop, sow indoors or in a greenhouse to be transported out.
You can sow thinly, directly in the ground from April onwards for summer crops and you can re-sow late summer for winter crops. You will need to transport any winter crops indoors/under glass or use cloches from the start of autumn.
You can make a start on harvesting once the heads have matured, ensuring leaves are dry so they don't rot. You may get two-three repeat chances of regrowth before the season is out and the plants go to seed. Keep watered and weed-free; checking your variety type for specific instructions.
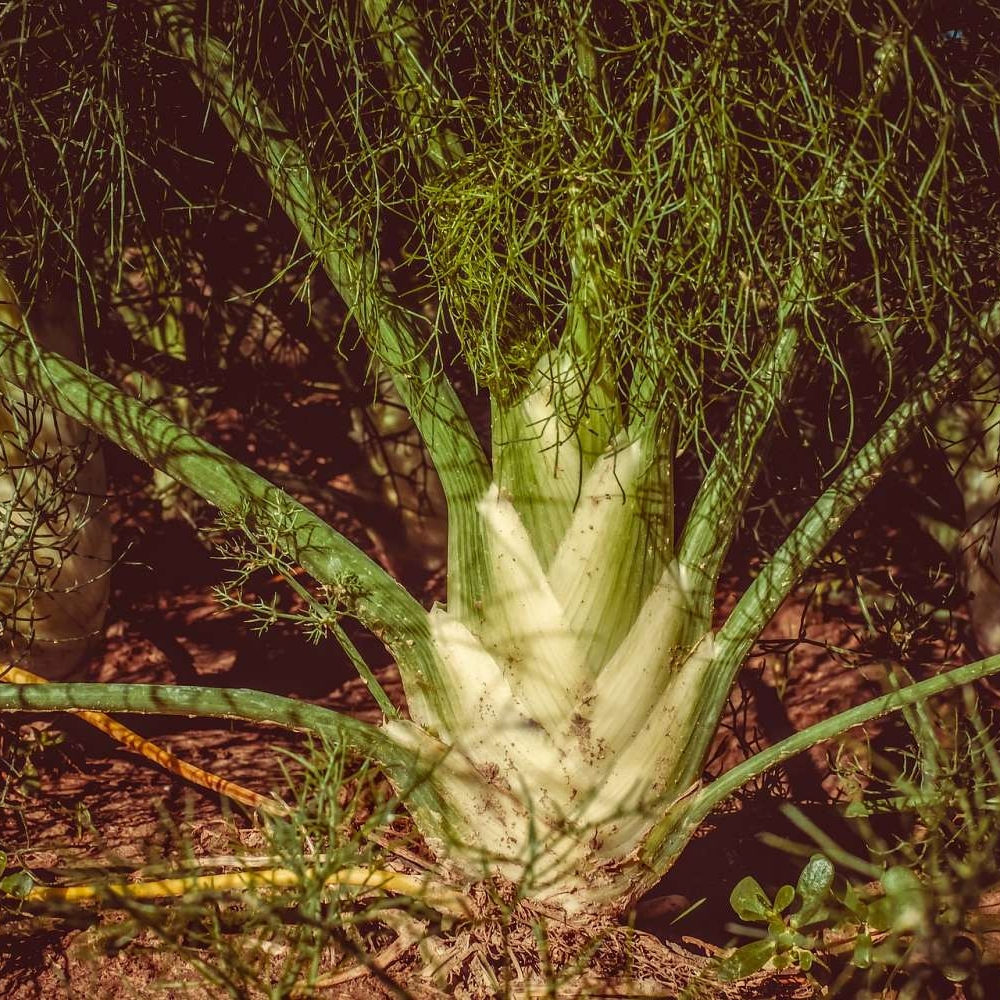
Florence fennel is best sown directly outdoors late Springtime (early May time) as it is very sensitive to having it's roots disturbed. Otherwise, you can sow earlier indoors but use modules to plant out, hardening off first.
Fennel loves the warmth and should be planted in a sunny, open and well drained spot about 12 inches apart in rows; you can thin them out as they grow if need be. They like moisture but are pretty resistant to dry spells and once the bulbs fatten up you can mound up soil around them from the middle of summer time until the autumn.
The bulb will be matured and ready at about 8-10cm and can be cut off at the ground surface level.
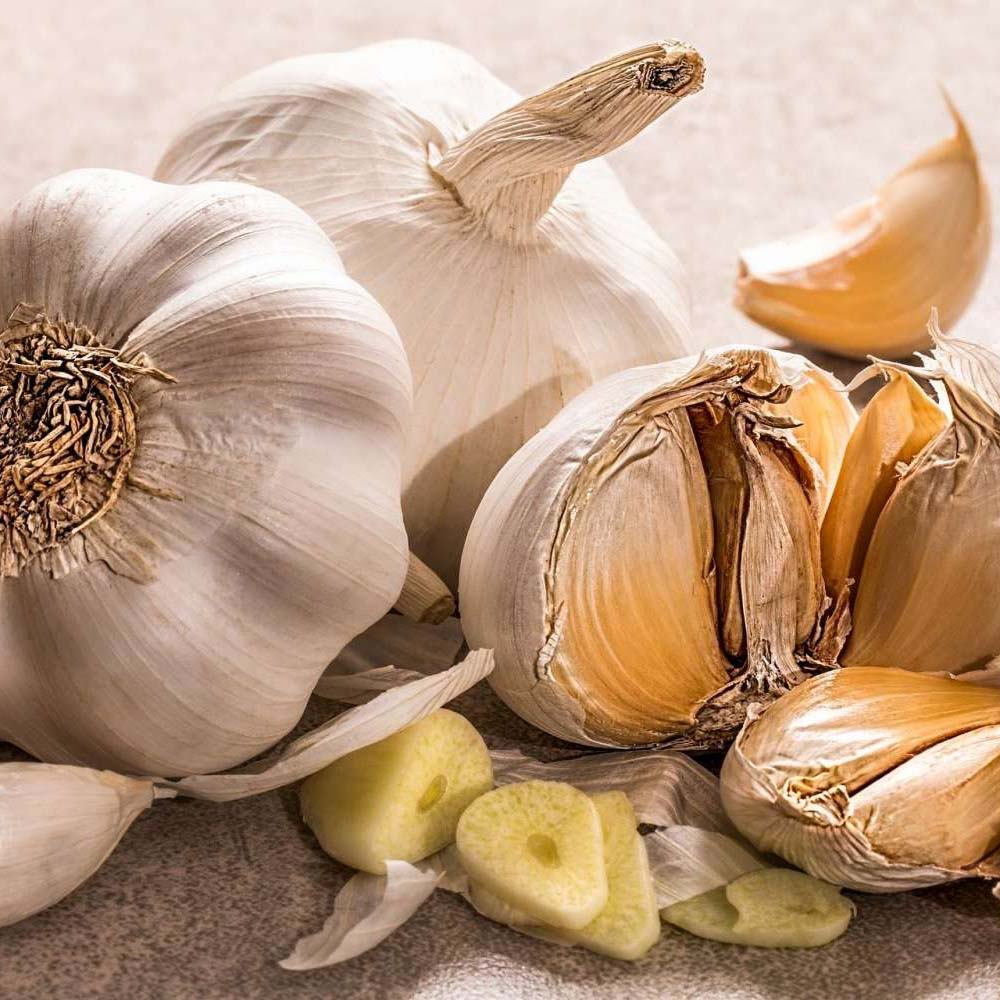
Garlic is best sown in the autumn as the cloves require some cold to help form the bulb. Early Spring is fine too. Break the seed bulb into individual cloves and plant in well drained soil with the point end facing up with just the tip showing. Each clove should transpire into a whole bulb of garlic.
Whilst growing, they form beautiful flowers at the tip of their foliage; being part of the allium family, it's no surprise that it does look similar with it's round head of petals. Unfortunately, you will benefit from removing the flowers so that water and nutrients are not wasted and head straight to your bulb. Like onions, the garlic bulb is ready when the foliage is dying off. Some people plait the foliage when storing to hang the garlic bulbs to dry out.
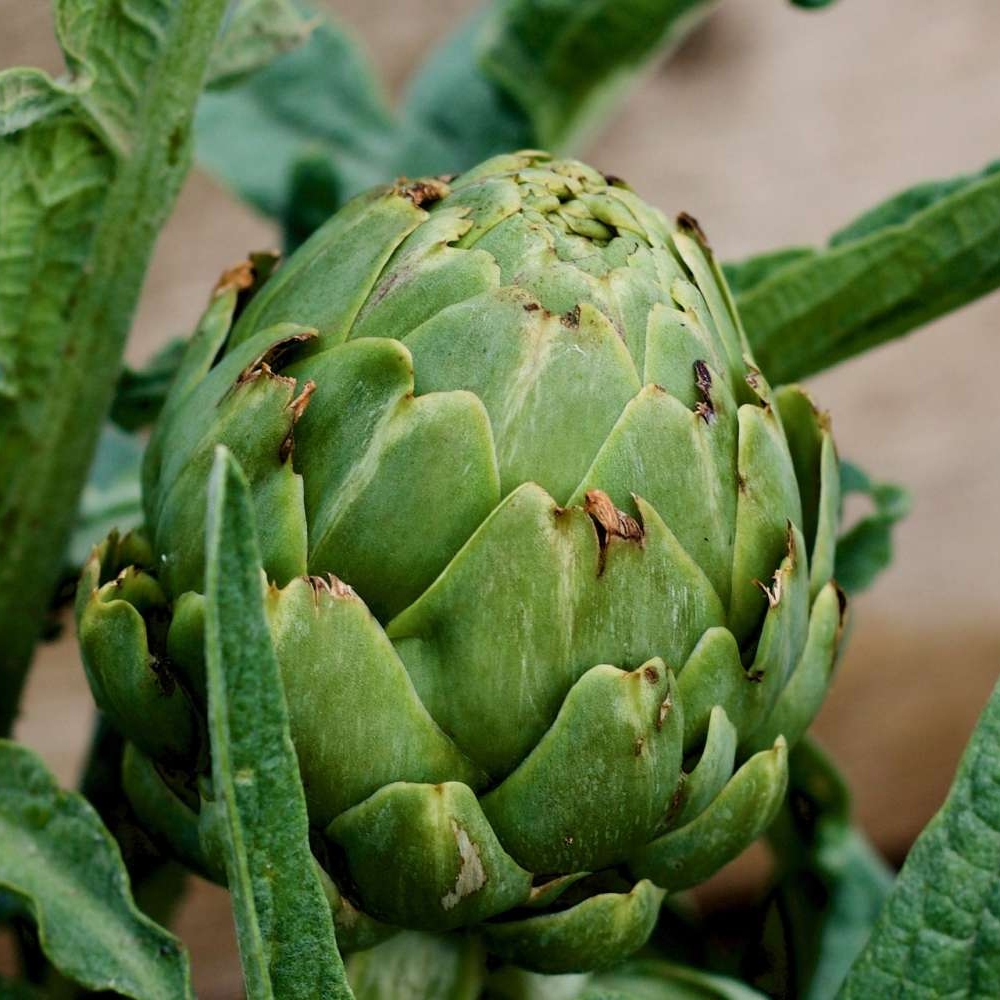
Not to be mistaken for being anything like Jerusalem Artichoke, which is another plant family altogether, this plant can be sown from seed. Plant in spring; March-April allowing for plenty of space in between them. You may want to start in pots and then plant out when they're established seedlings.
Globe Artichokes are pretty versatile in terms of soil as long as it's well drained and weed-free. They are a perennial plant that should keep you going for a few years before being spent of the ability to produce the heads.
This plant produces blue/purple thistle type flowers. You can harvest the heads/crowns from July onwards, you will get secondary heads that will be bigger that too can be harvested.
Keep protected in cooler weather against frosts.
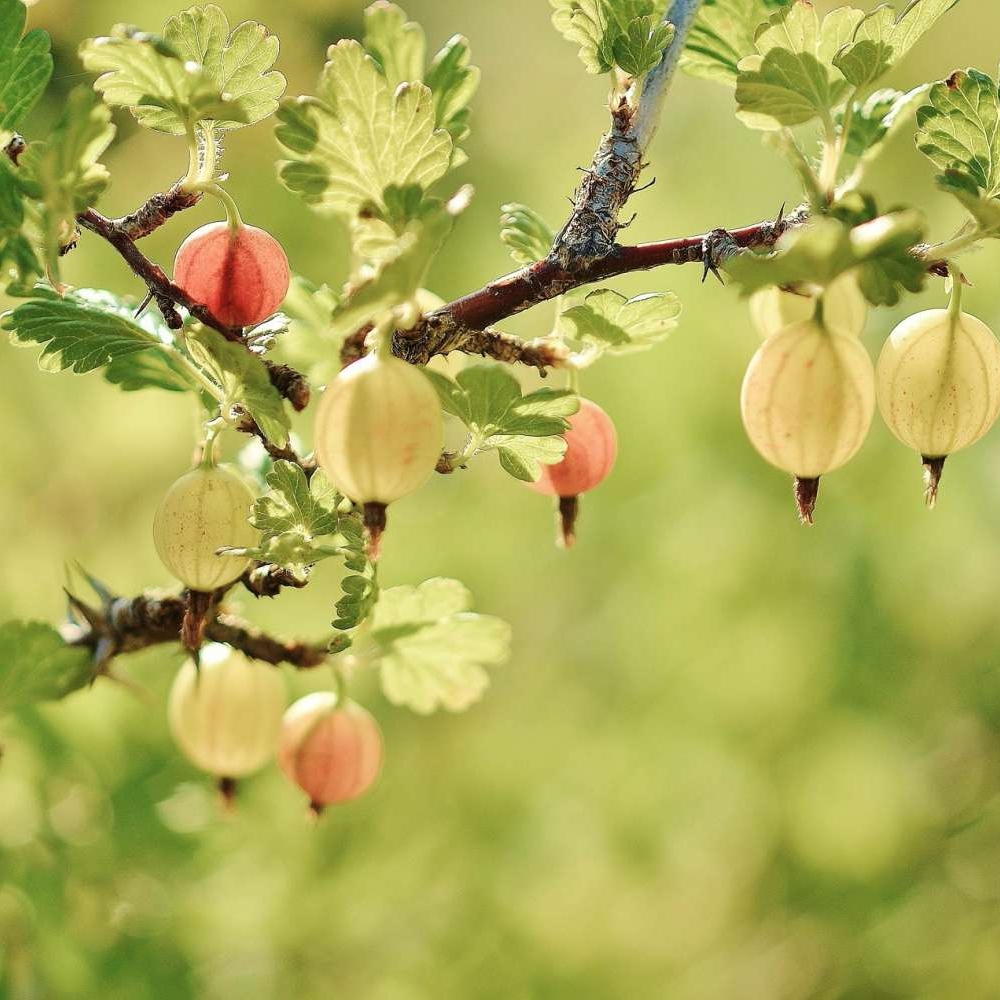
A great fruit to grow for beginners being very easy and resilient. Alike most fruit trees and plants, they are best planted during the autumn but you can plant anytime between September and March. Buy an established but young plant/tree a few years old for a head start.
It pays to keep them protected from the birds who also enjoy this fruit - you can cage your fruit trees or use netting/gauge. Gooseberry plants require watering during dry spells but don't require a lot of water.
Young berries will be ready for picking early summer or you can leave longer to mature dependent on your taste. Picking encourages re-growth, June and July should give you a good glut and you may also need to keep training and pruning during the autumn once it has fruited.
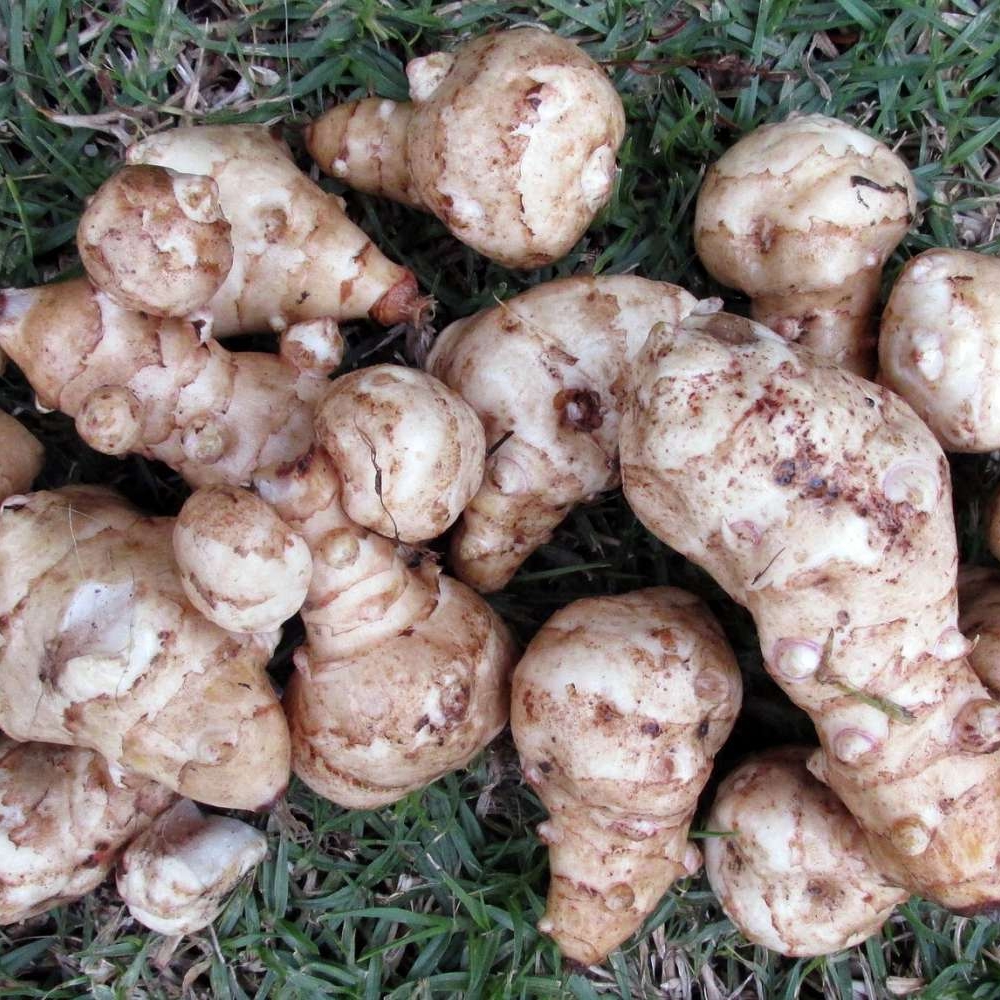
Not to be confused with Globe Artichoke, which is not in the same plant family and differs considerably, although both are popular and edible.
They are tubers as opposed to seeds that you can buy and plant during the spring; March-April in well drained weed-free soil.
They can grow very high and should be well spaced out with the ability to offer them solid support later on and during strong winds. Mulch as well as earth up around the base to help stabilise it and prevent from rotting.
You can leave them in the ground until you're ready to eat them from late October and in the meantime enjoy the beautiful flowers it produces.
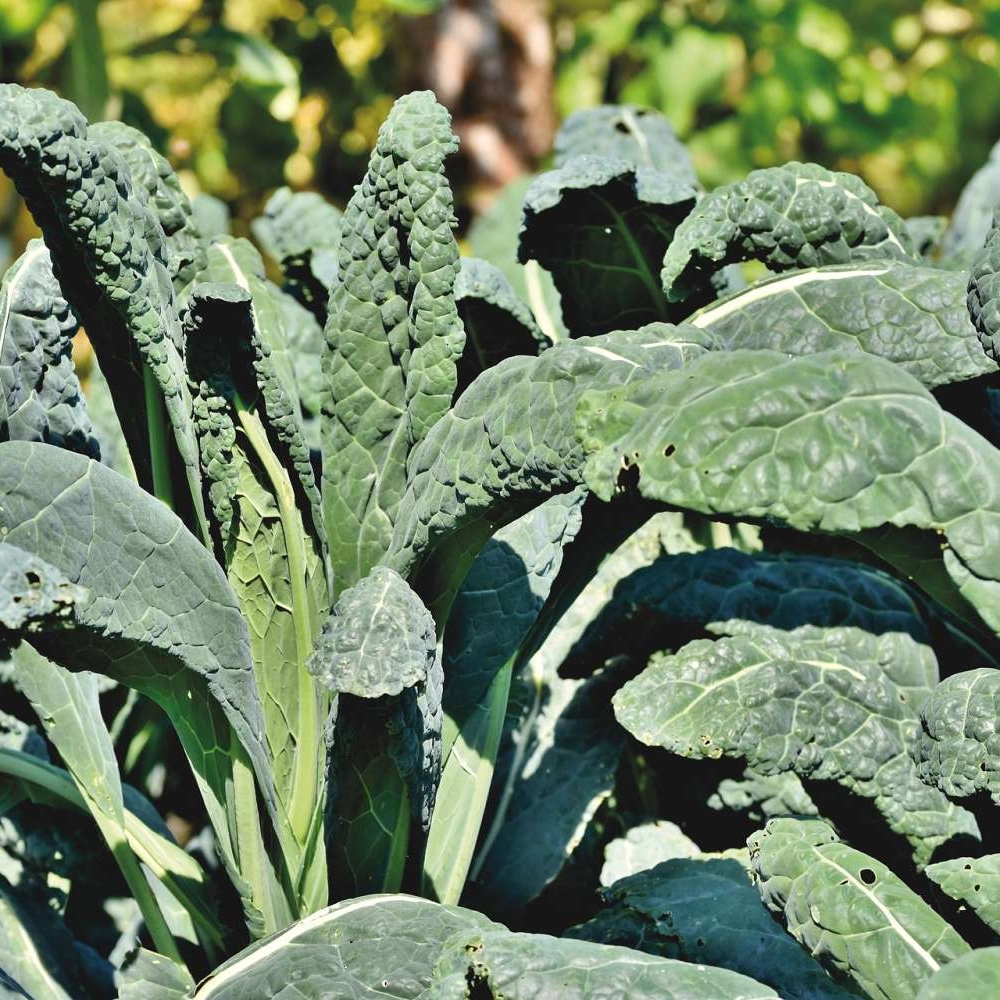
A more versatile brassica and full of nutrition, kale seeds can be sown during spring, about 6 inches apart in rows, which can be thinned out when the seedlings have appeared.
Netting is recommended to stop the birds, although kale is pretty resistent to other common pests. Keep watered during dry spells and weed-free.
You can start picking the leaves, starting with the top leaves from during autumn; during October onwards. Side shoots will then form and you can keep harvesting from around February though to late spring-early summer.
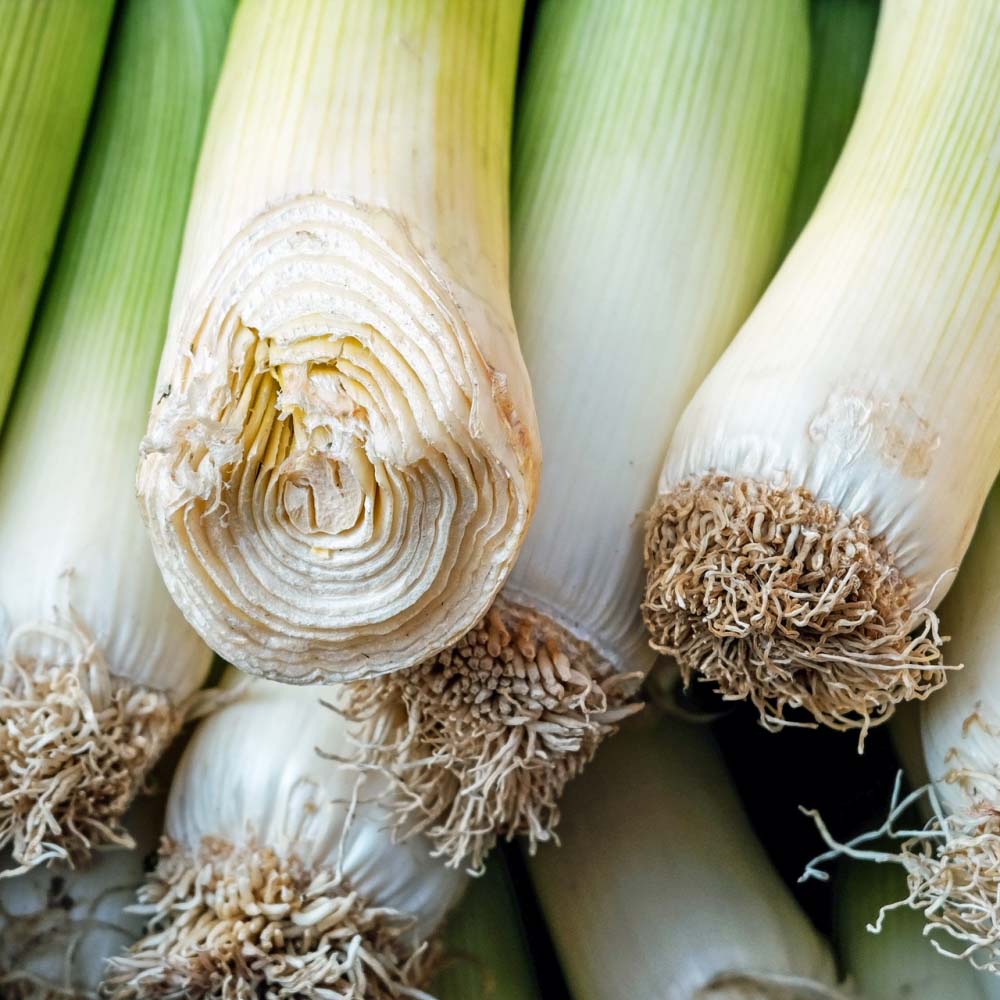
We normally grow leeks from seed in trays inside from early Spring. They germinate well but are pretty delicate for a while; resembling blades of grass.
We transfer ours late spring/early summer to a moist area with compost that has been dug in when they are approx 15-20cm high and are thicker. You can make small holes and a dibber or trowel to transport them in, ensuring the roots are well covered. Keep the area weed-free and moist with regular watering. It pays to turn the soil over to allow air and moisture to it also.
Ours are usually ready to harvest well into the autumn; remove the 'meatier' looking ones first to allow smaller ones to continue growing. They will be fine in the ground through the winter so you can pull up as required. Having said that, if you have a lot of cold weather and hard ground you may want to harvest and store. When they grow very big they can sometimes lose a bit of flavour.
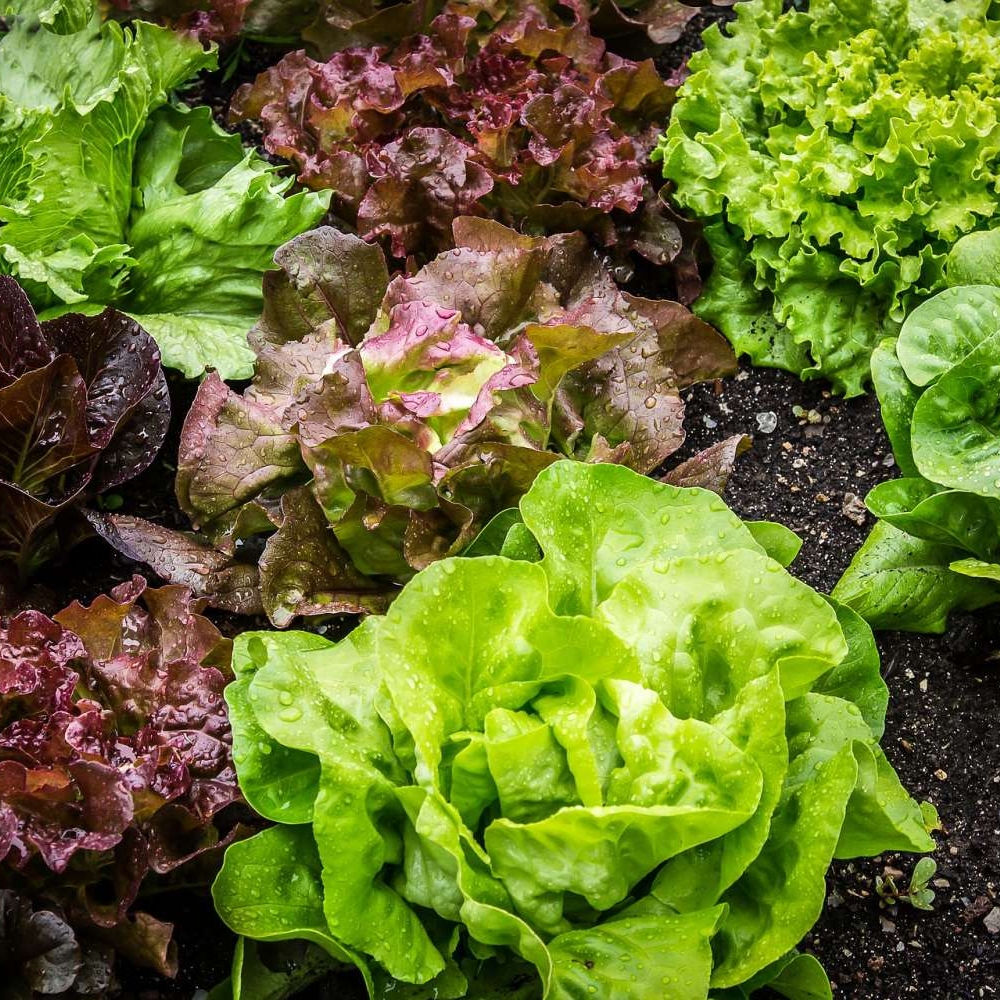
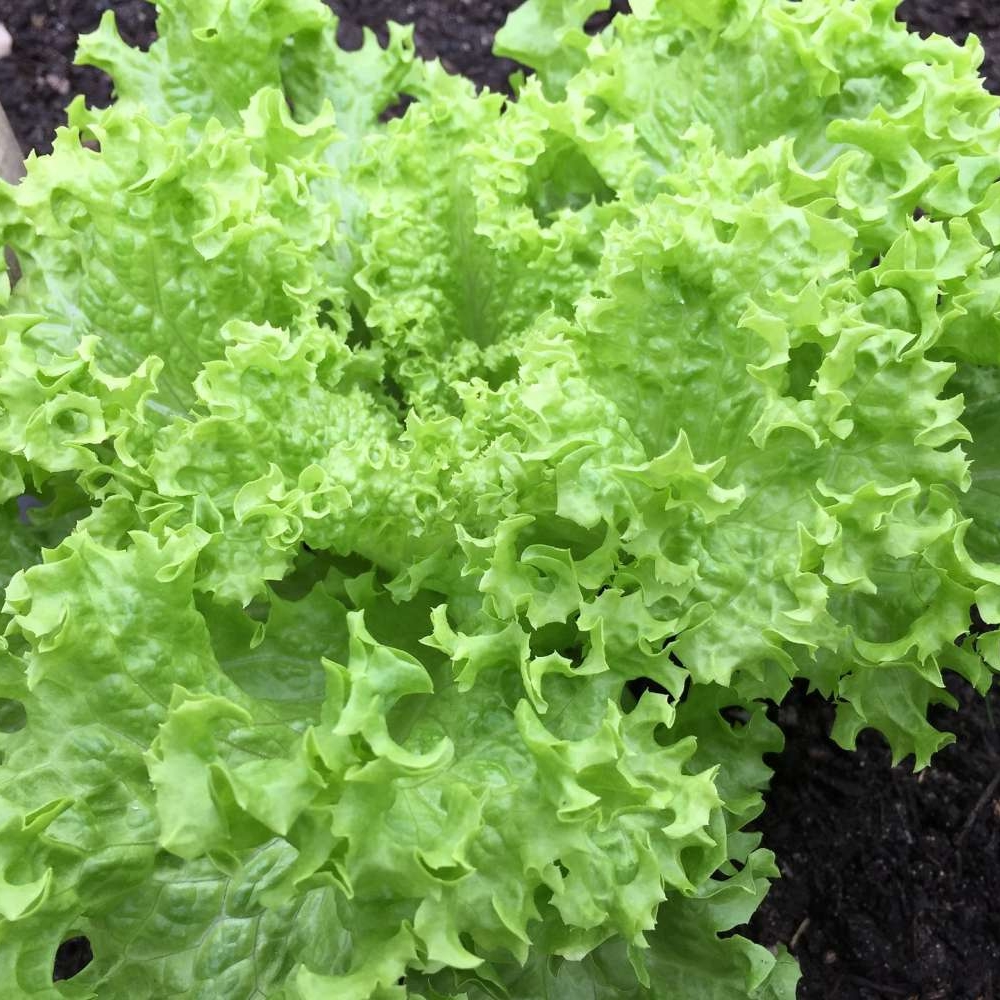
Lettuce comes in several varieties and can be grown to give a year's round supply of salad leaves. Check your variety type and seed packet for specific instructions and sow in a sunny spot. There are Spring, summer and autumn sowing types but early or late sowing may need to be kept under cover until the warmer climates arrive.
Stagger your sowing for a continual supply and space well apart in full sun when you transfer outside. Keep well watered in dry spells and weed-free. Lettuces can be fast growing but watch out for slugs and snails who like them too! Netting is also a good idea until they're established to stop the birds.
When you're satisfied that your leaves are large enough with a firm middle to the lettuce, you can harvest. Keep an eye on them as they will soon bolt if left.
Please see Courgettes.
Mange Tout is a variety of peas where the pod is edible; alike sugar snap peas. Please see Peas.
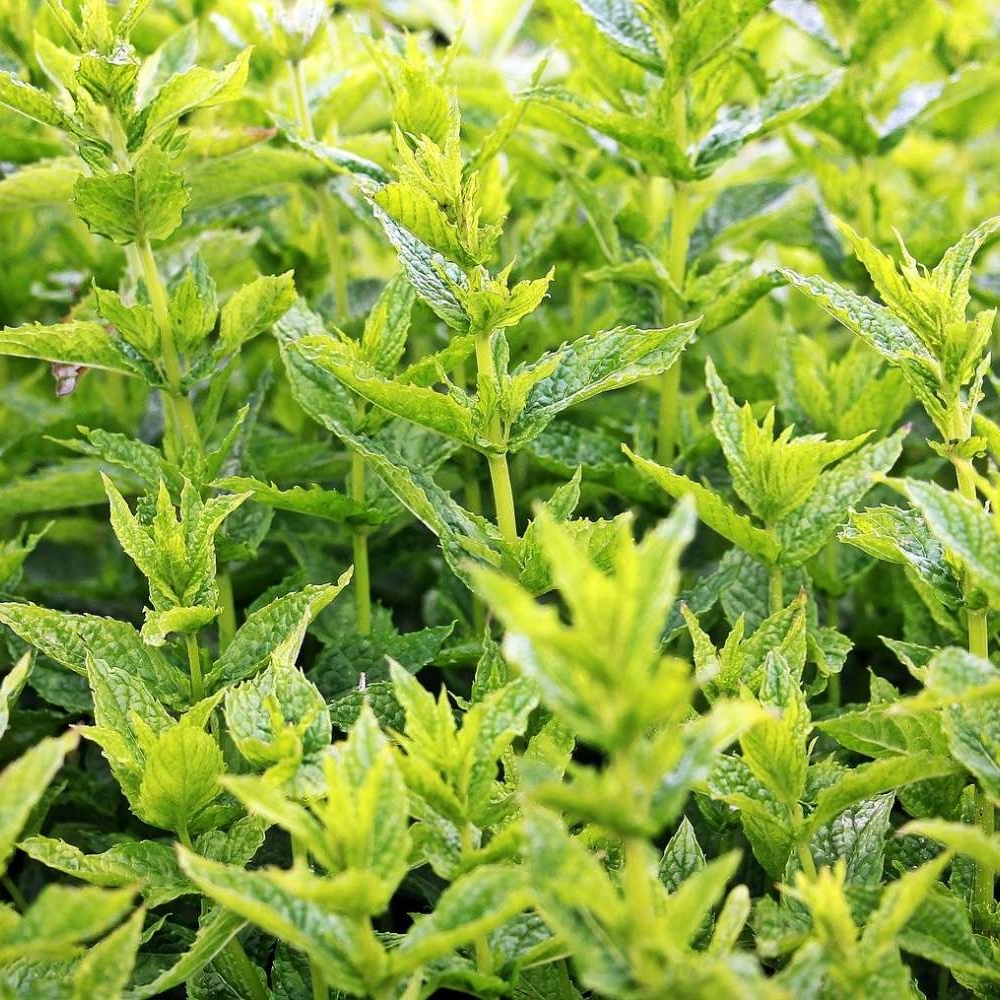
Mint is an easy, low maintenance plant to grow, but needs to be kept in check if you don't want it spreading all over! You can plant in the ground but we recommend using large pots for outdoor mint to help contain it and make it easier for picking the leaves.
You can regularly pick leaves throughout the growing season. The plant will die off in the autumn and over winter usually but will come back to life during Spring with a fresh batch of fragrant leaves. Harvest frequently for re-growth of new shoots.
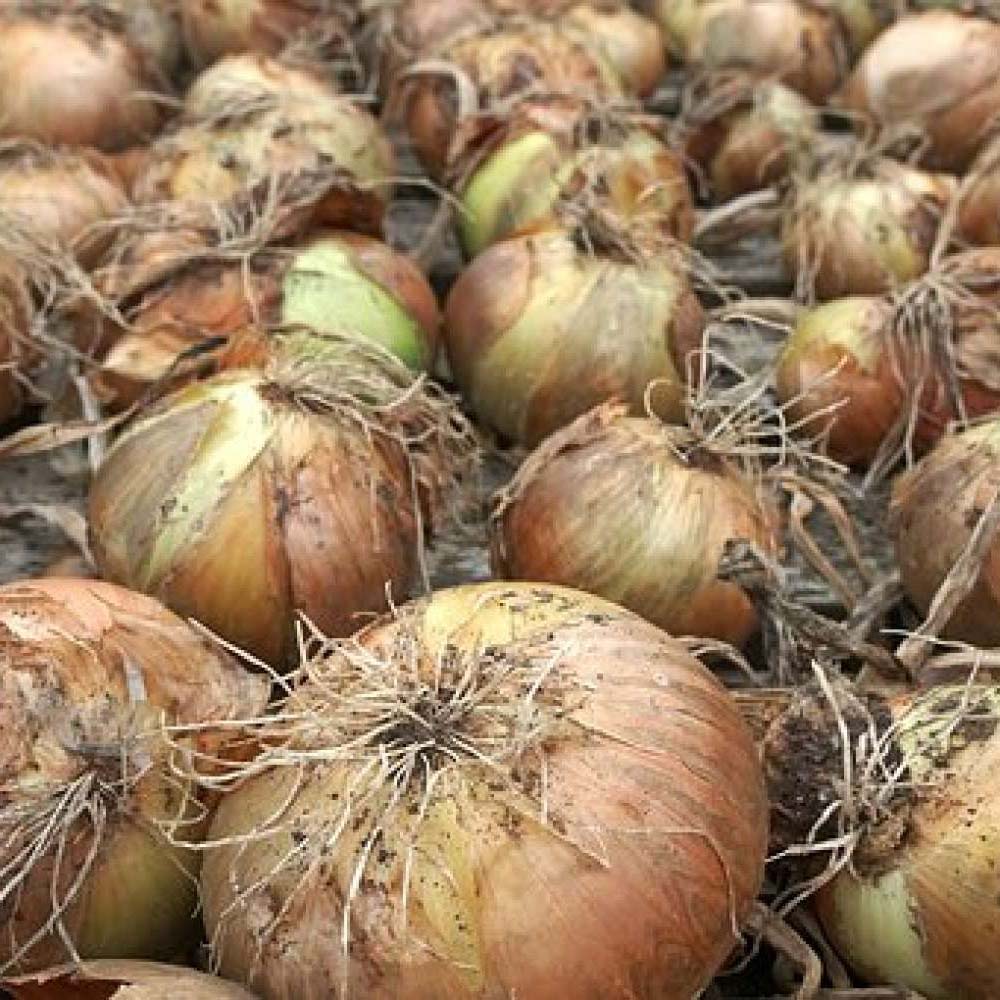
We tend to buy onion sets as they are much easier to grow than seeds. You can plant them in the spring or autumn. Place each set, root end down in moist, good quality soil leaving just the tip showing. Space your onions about 10cm apart and leave approx 30cm between rows. Water regularly and keep weed-free.
Flower heads similar to an alium (same plant family) may appear and as pretty as they are, they are taking vital nutrients, so you're best off removing those. When the onions are ready to harvest, the foliage will start to bend over and die off.
You don't have to rush to pull them up if you like them to grow a little bigger than they are . Once you have harvested the onions, allow to dry out and store.
We tend to sow directly into the ground during Spring. Like our method for carrots, we prepare well a bit of a trench filled with good compost before sowing liberally and covering with a thin layer of soil.
Mix the earth in with the compost try prevent it drying out too much and water until established and in dry weather.
Parsnips can take a while to germinate; approx 3 weeks at least to start appearing and can actually be quite tricky to germinate at all hence the generous sowing of seeds. You can always thin them out later on.
Thankfully we have always grown parsnips successfully and plentifully. The parsnips can be ready from September onwards when the foliage is dying off. There is no rush to pull them up, you can leave them in the soil until you want to use them. At least wait until after the first frosts anyway. The longer they're left in the ground, the sweeter they taste. Having said that, bear in mind that the ground can be rock solid in cold dry weather and impossible to dig so you may want to keep an eye on the forecasts over winter! Parsnips can be blanched and frozen too.

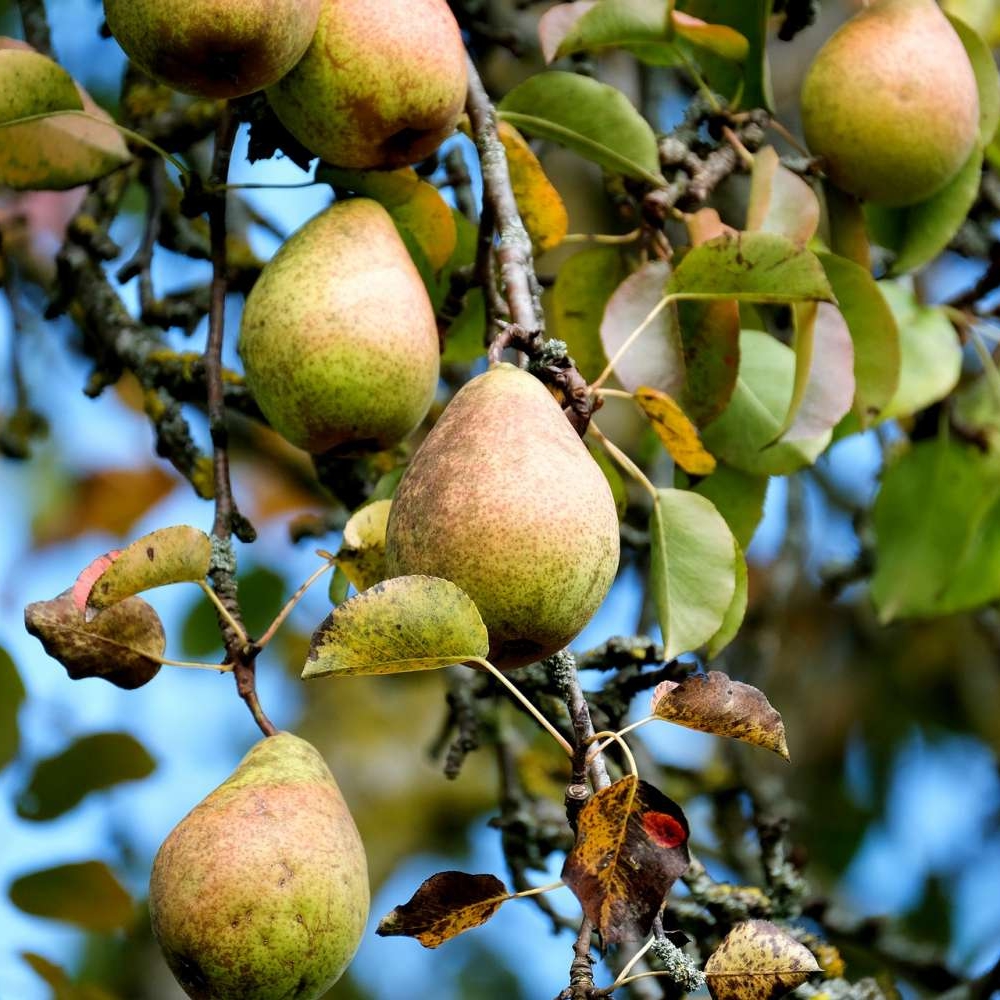
Pears, alike apple trees are easy and need very little care once established. You will get a good glut of pears at the start of autumn from a healthy pear tree and it should be planted during the autumn and pruned every year; again during the autumn or dependent on your variety.
Again, pear trees can grow to quite a size so do plan well with the long term in mind when deciding the location to plant your pear tree/s. As with any young plants, it will require water during dry spells and may also require support until it is stronger and more mature.
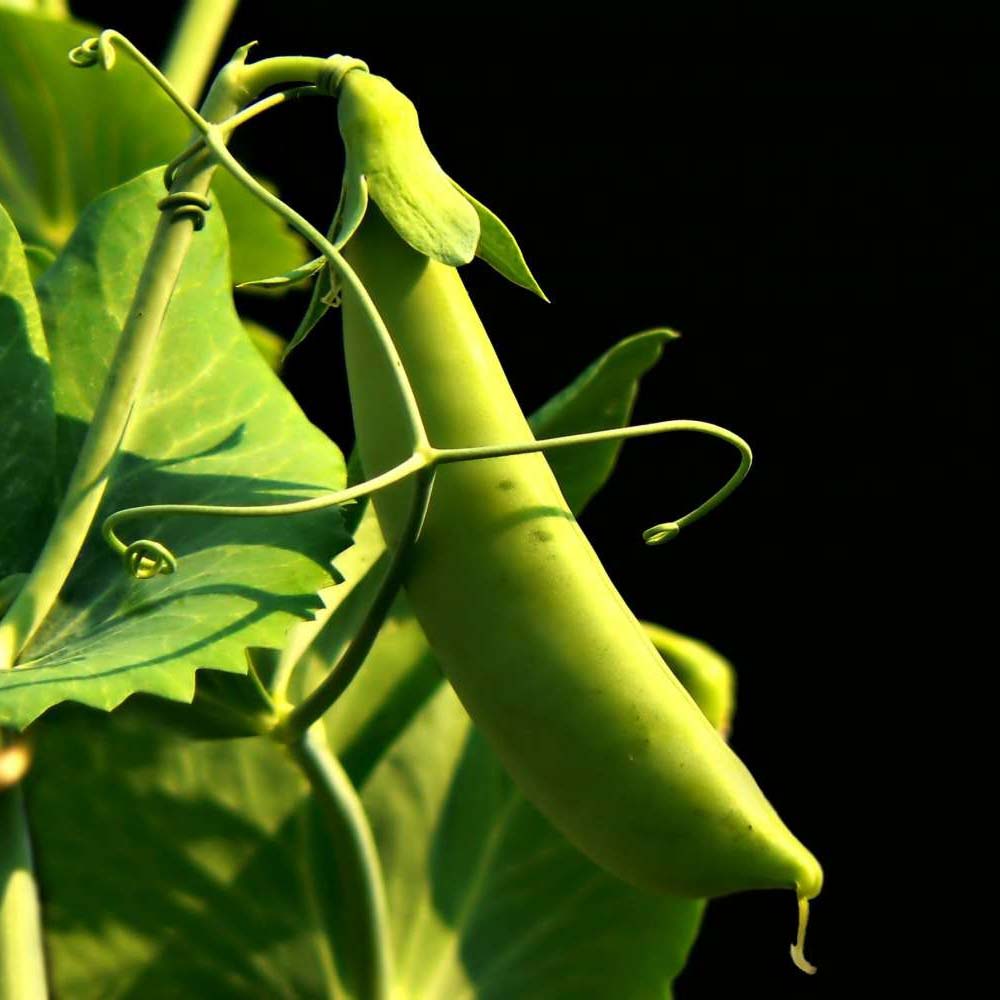
During Spring, we plant our peas directly into the soil. We dig a small hole approx 8cm wide, fill with compost and sow two pea seeds spaced apart and cover. Each hole will be about 20-30cm apart. Place a cane to support the pea plants; the foliage can rot when it trails along the ground.
We usually cover our seedlings with netting too for protection against the birds.
Keep them moist with watering but don't over-water. Peas can be a bit delicate to the weather conditions and don't like extremes. They will start to produce pods that look flat in appearance. Do not mistake these as edible because they are in fact poisonous! The pods will look bulbous and about to pop when the peas have formed and are large enough to harvest.
Keep picking ready pods of peas to encourage re-growth. The plant itself will start to die off when it's spent.
You may want to have a fair amount of pea plants on the go; in fact stagger the sowing to continue your supply. You will be surprised that once you've started shelling the peas, you can end up with a spoonful for one meal unless you have plenty of healthy plants! The peas are lovely and sweet raw too and are fab to chuck in a salad. Some varieties such as Mange Tout and Sugar Snap Peas have edible pods.
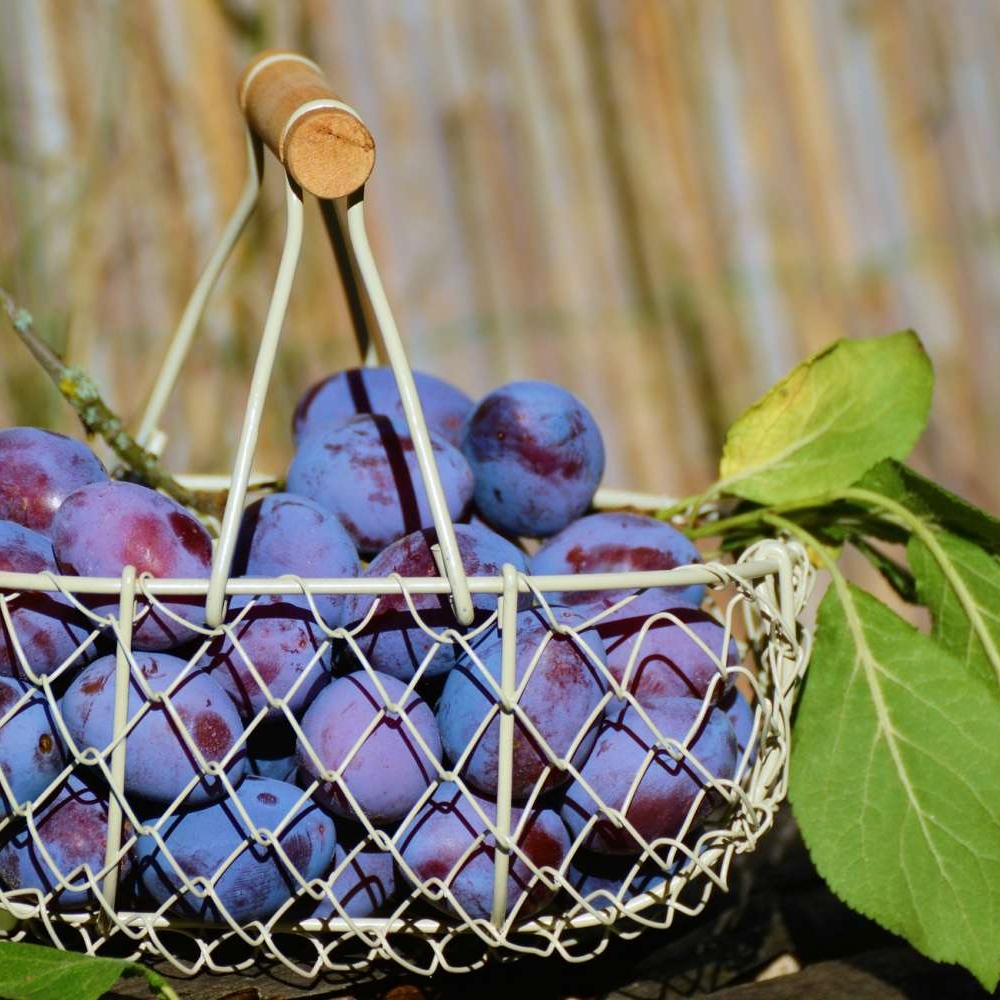
Plum trees should be planted in a sunny well drained spot during early Spring or winter when the tree is 'redundant'. They are very thirsty when producing so do require regular watering and good moist soil.
Flowers can die off if it's too cold or frosty and may require protection although the tree itself is resilient. As the fruits appear and grow, the weight of them will cause the need to pick regularly and also may need some support to the branches. You should get a great glut from a healthy tree and frequent picking of ripened fruit will help the fruit to grow further into it's space. Any pruning should be done during the summer.
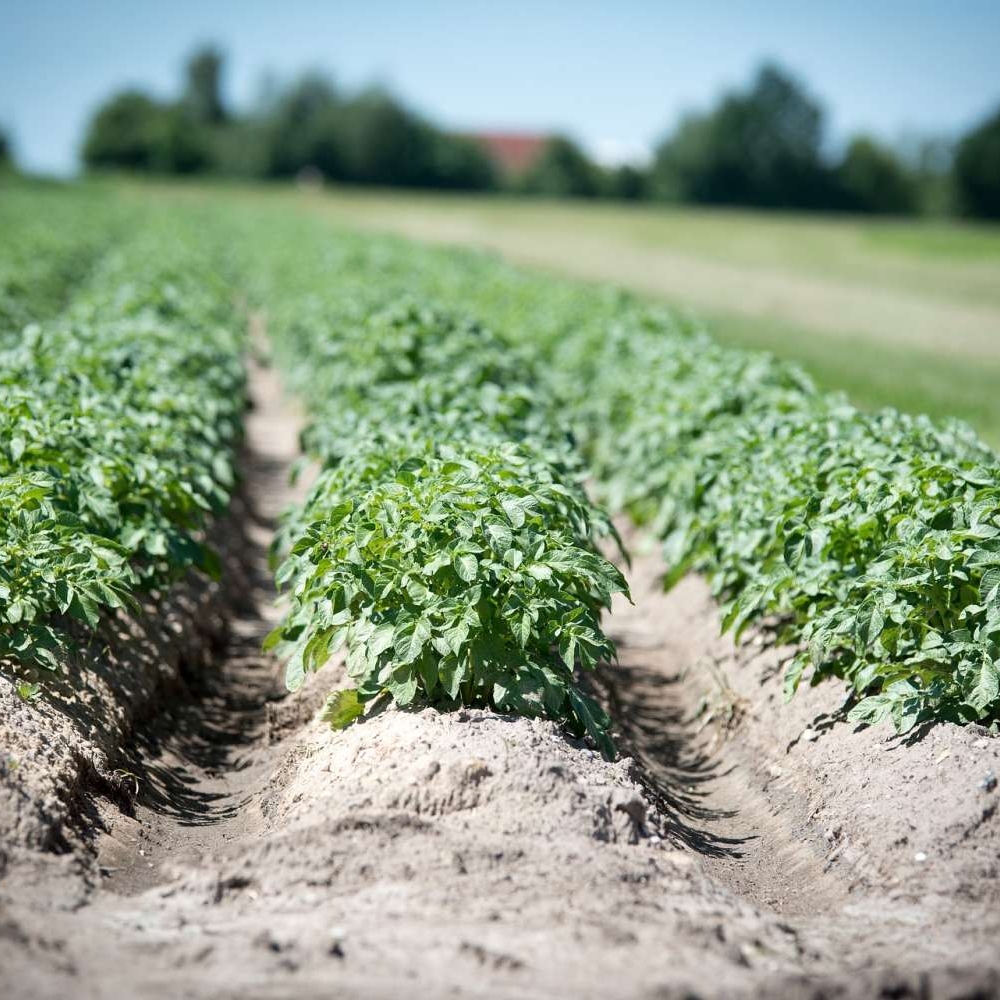
There are many varieties of potatoes and there are also differing times to plant them from your first earlies through to your second cropping potatoes (with second earlies, early main crop and main crop in between).
Your potatoes can take up a vast amount of space on your plot; dependent on how many you want to grow, of course and probably have the most labour-intensive work involved in terms of digging deeply! Potatoes on the whole are very easy to grow; we tend to have many a 'volunteer' potato plant growing no matter how thoroughly we think we have cleared the area after harvest!
We find that with regards to crop rotation, that this is the most important crop to grow elsewhere each season. We find they're pretty resilient in soil types but rotating them helps reduce disease.
So, from the beginning of the year - January to February you can begin chitting your potatoes to help stimulate root growth, by placing them in a tray, empty egg boxes or some form of suitable open container and keep in a bright and cool position. You will find that chits form at one end of the potato called the 'rose end'. Personally, we don't bother and always get a generous crop but everyone does things slightly differently; and there may be weather and soil conditions to factor in.
You can buy potato seeds or even use old potatoes that have sprouted. Prior to planting, you will need to dig deep and rid your area of weeds, large stones and add some compost. If your soil is more alkaline, you may want to add some sulphur to help stop your potatoes from scabbing. Acidic soil is best but as I say, they are pretty resilient. For better results, you may want to do this after harvest towards the end of the year in preparation. Frosts and over wintering weather helps to break down the clumps and settle the soil.
When you're ready to plant out, prepare the soil by digging trenches in a row; approx 10m deep and plant your potato seeds rose upwards. Cover the seeds well and when the first shoots appear up through the ground, earth them up (mound earth up and over them) and do this regularly until they're more established to protect them. They will need watering in dry weather or unless the soil is very moist after a fair amount of rainfall, particularly when the tubers are developing.
Flowers will appear on the plants and some varieties produce small potato like seeds that sit above ground - these are inedible and are poisonous!
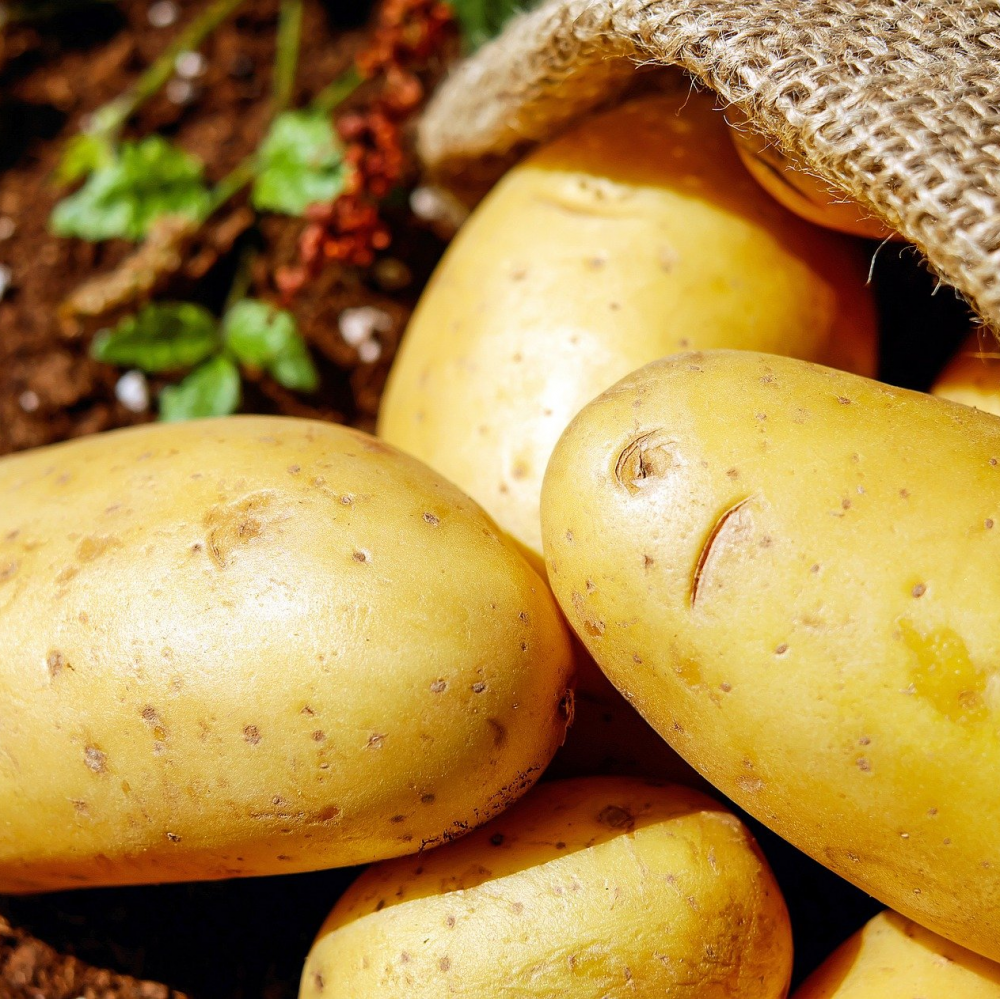
The foliage will start to die off and you can start digging up your spuds! You may want to try with just one plant or small area first to see how they're looking. First earlies take about 10-12 weeks to grow. Later crops can be left a bit longer so that they form a nice skin.
Once you have started to harvest your potatoes, it's important to store them in a cool dry place; preferably in a hessian or brown paper sack (not plastic as they tend to sweat) ensuring they're dry to prevent rotting. We tend to let them dry out, taking off any wet mud and checking the quality for any holes, rotting and so on before bagging them up. We currently have about 10 months or so supply usually and are aiming for a full year's quota!
Obviously follow your potato seed variety's instructions on when to grow but as a rough guide first earlies can be planted from the end of February to the middle of March. The next few crops can be planted around the middle to the end of March and second cropping potatoes can be planted at the beginning of August. This will be dependent on weather and conditions where you are.
Seeds should be planted sideways and it's worth noting that if you soak overnight first, it speeds up the germination process.
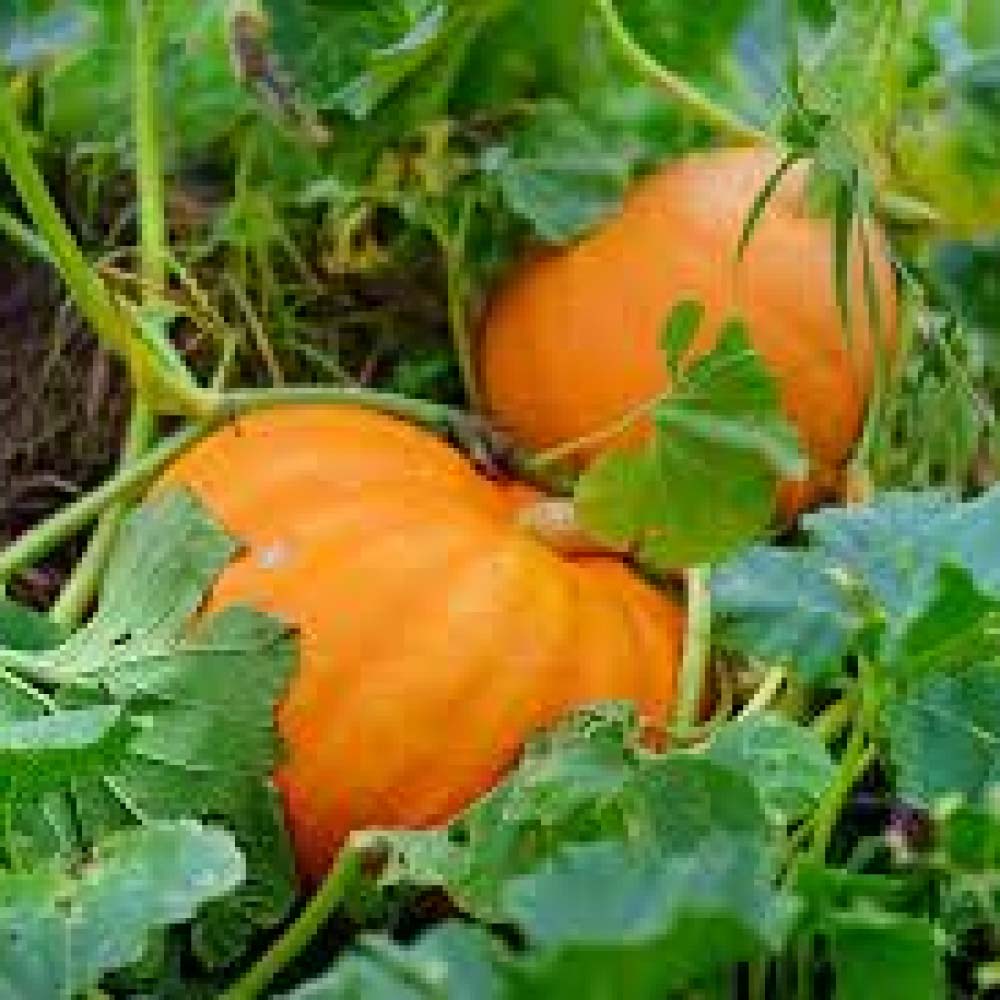
You can plant pumpkin seeds in small pots from Spring or plant directly in the ground late May - June to ensure a Halloween-ready Jack-O-Lantern.
Keep seedlings in a warm and sunny spot on the windowsill and re-pot once they've established themselves and you have a plant to work with.
Once planted out, you need to allow for a good space for the foliage and fruits to grow in good well manured soil. Water in dry weather and train with some encouragement your trails. You can also manually encourage pollination with male and female flowers.
Keep the area weed-free and once fruits begin to appear, raise them onto a hard surface such as a plank of wood or lay some straw to prevent the bottoms rotting. You can remove excess foliage to provide more sunlight to ripen the pumpkins.
When the skins have hardened, they should be ready to harvest. Happy Halloween!
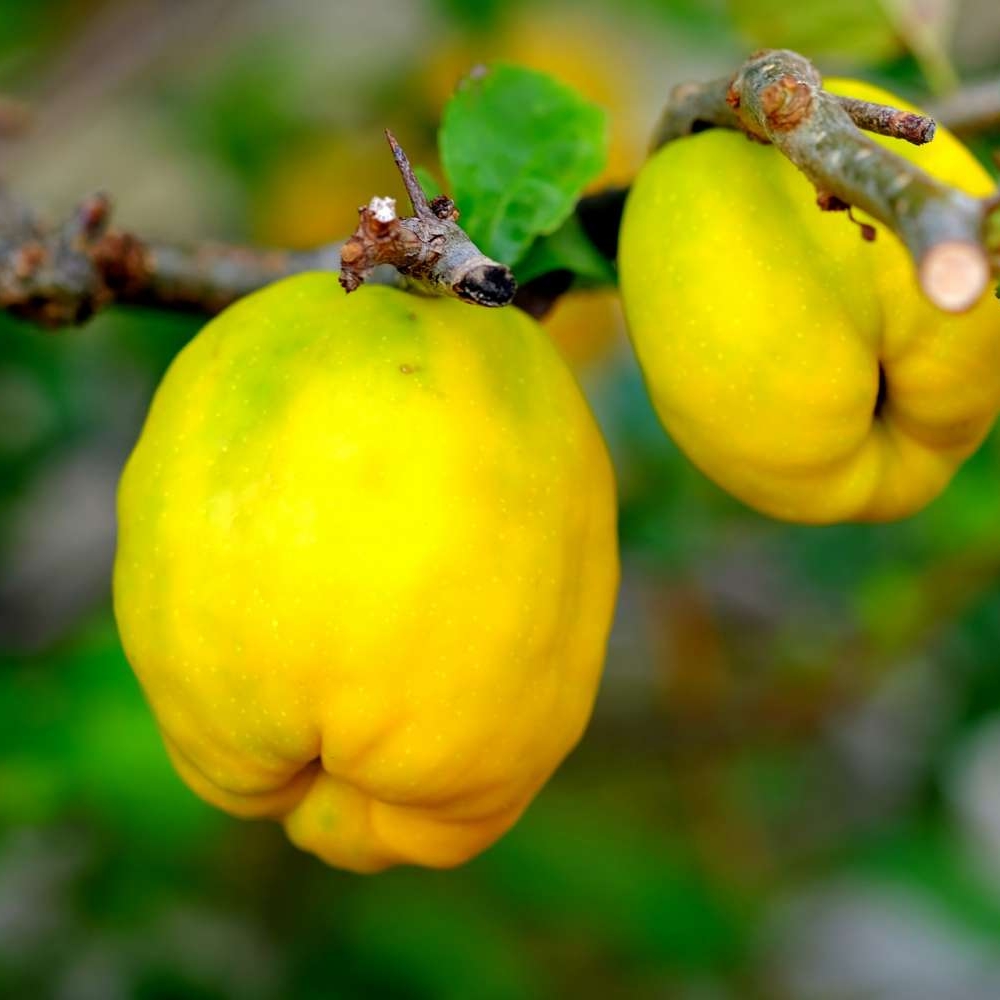
Quinces are fairly easy and straight forward to grow and are an attractive addition to your allotment. They like an open sunny position and should be trained to grow spread out to get a good ripened glut of fruit each season.
They will require water during dry spells and be sure to pick your planting spot with the longer term in mind as they can (dependent on variety) grow very tall as well as spread out.
Unspoilt fruits can be picked during the autumn and should be stored somewhere cool and dark but not touching each other. Give the fruit time to mature; about six to eight weeks before using them.
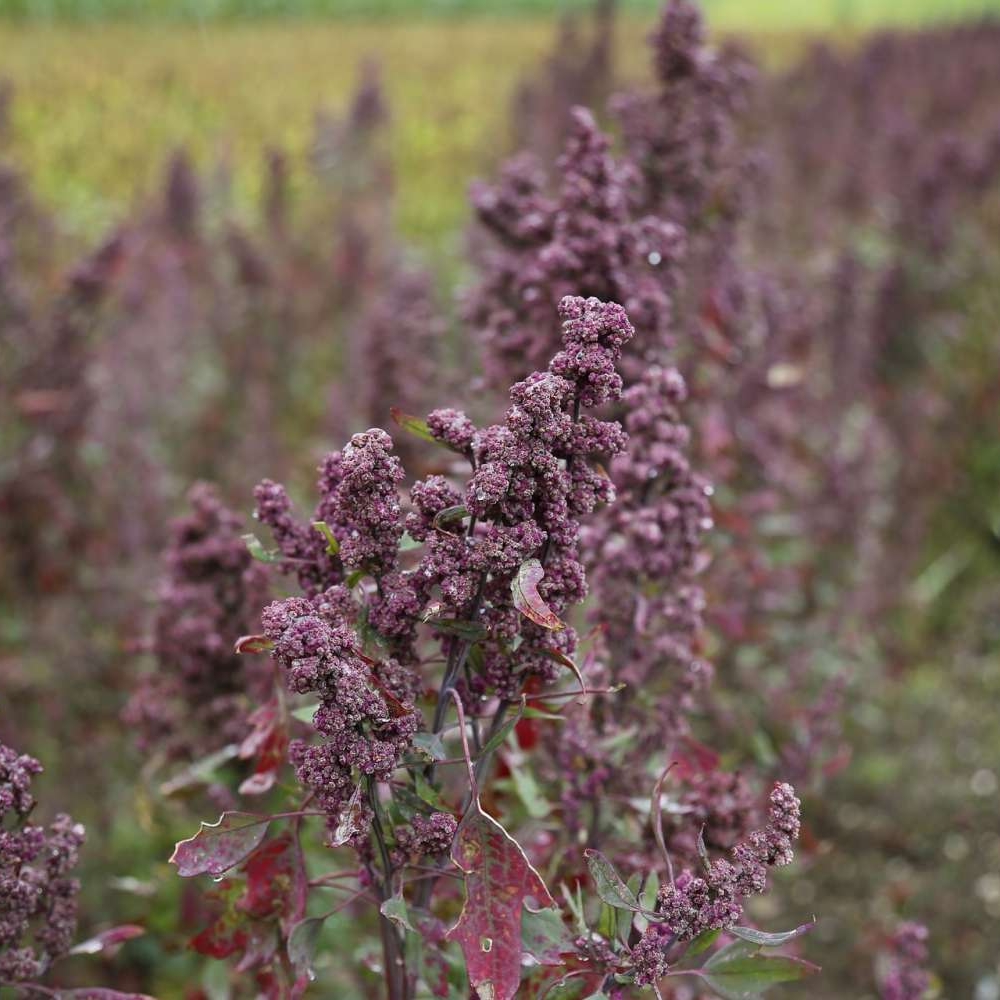
Quinoa seeds can be sown directly into the soil during April in row; you may not get a high percentage of germination so sow generously - you can always thin out later on to give your plants approx 15 inches of space in between.
It's a good idea to visibly label this row well because the seedlings and young plants look very weed-like and you don't want to be pulling them all up by mistake, keep on top of any 'real' weeds though. Keep watered during dry spells too.
These plants can be slower to take-off but once they get going they will spurt and can be around 2 metres tall.
During the autumn, when the leaves start to yellow, you will have seed heads formed that will be ready to cut. Snip of the heads and store in a paper bag or similar to allow them to dry out for a couple of weeks.
When dried, you can gently rub and sieve through to remove any debris and store your seeds in an air tight container. Do give your seeds a good soak and wash before cooking them to rid them of their bitter coating.
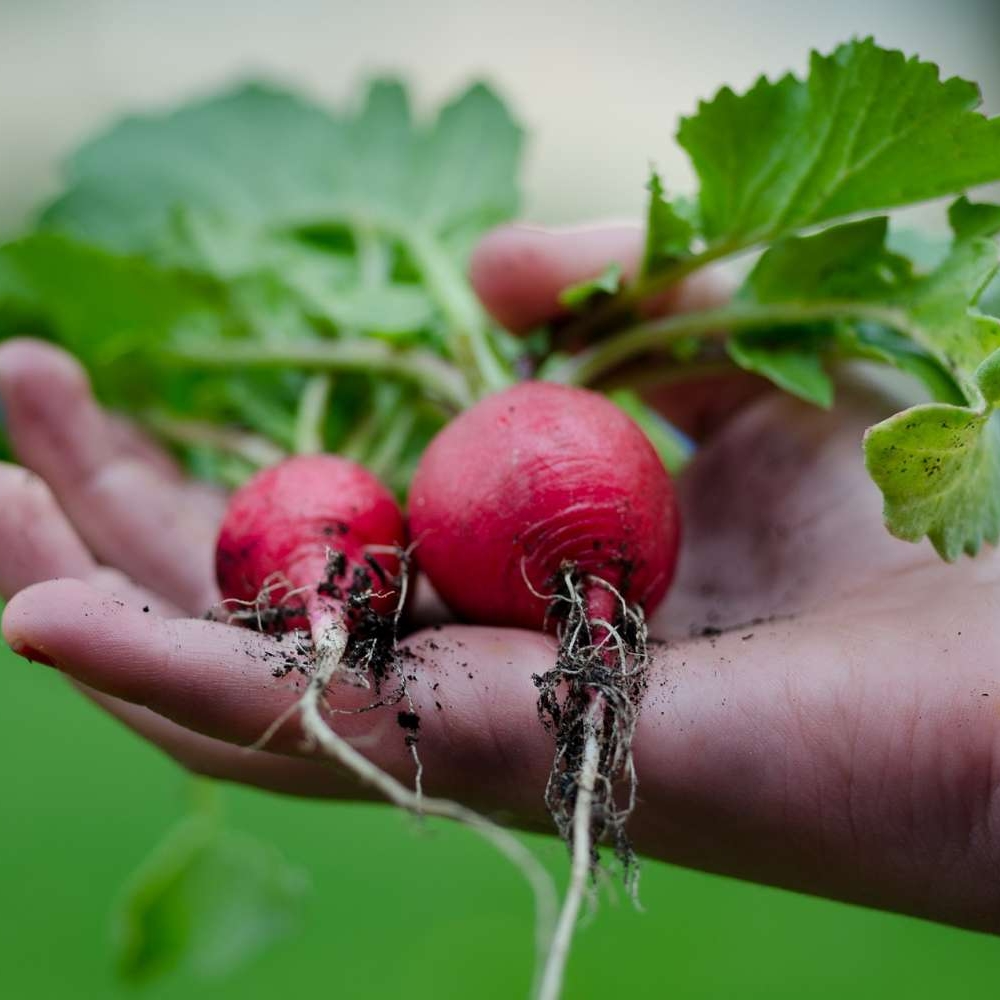
Radishes are quick and easy to grow, allowing for a staggered supply throughout the season.
The seeds can be sown directly into the ground a few centimetres apart in rows - sow thinly. You should get a high germination rate and it saves thinning out later.
Keep watered in dry weather and weed-free - a row of radishes can be squeezed in anywhere and can be sown from early spring throughout until late summer. Do be sure to look after them well during hot spells as they can split it left too dry.
Radishes don't disturb other, slower crops, you can even use them as a dividing line!
Harvest young for a flavoursome salad vegetable as they become rather splintery when too mature, later crops can be lifted as late as November and stored.
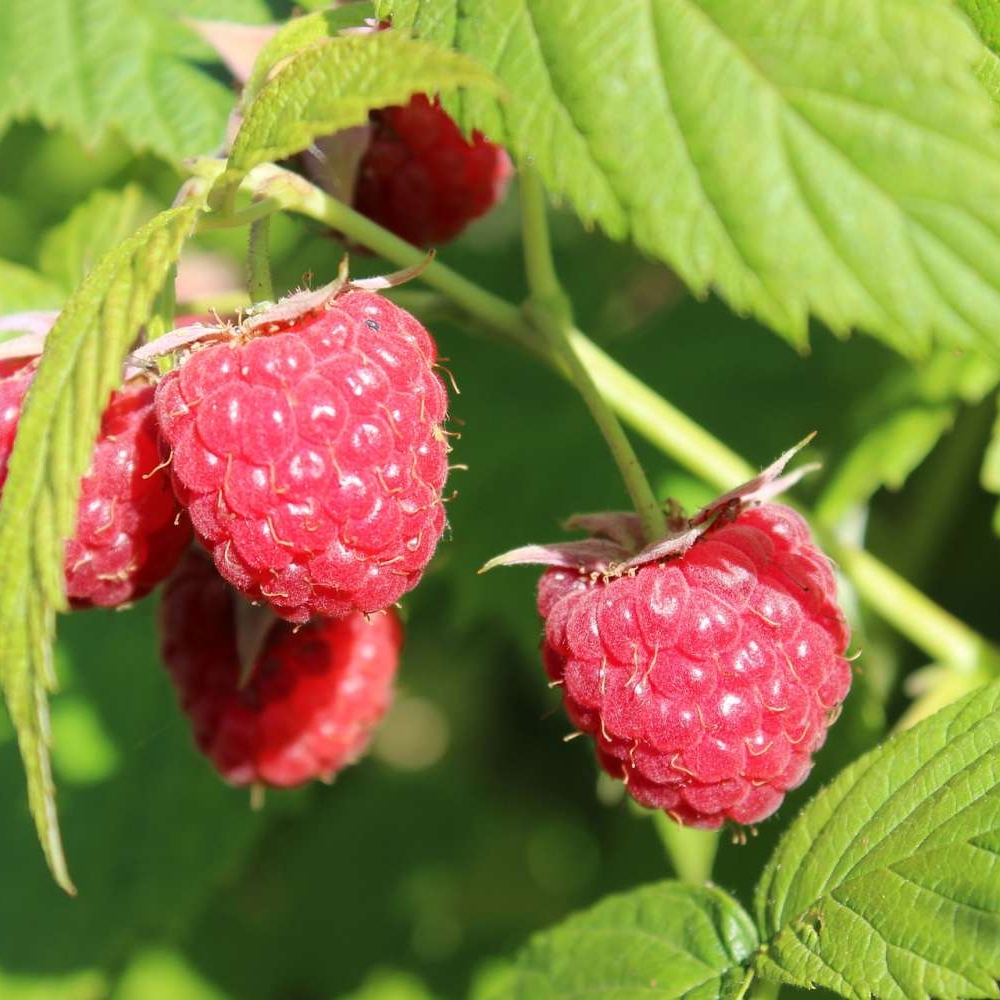
We were lucky enough to be given some younger raspberry canes from our plot neighbour who became overrun with plants. We planted it in well drained soil in a sunny position and it grew healthily although no fruits/very few small ones during the first year.
Since then the plant has really established itself; requiring cane support and a bit of taming and pruning but has provided a great glut of raspberries from summer through until well into the autumn. This can depend on variety.
It pays to give it some pruning regularly to help it thrive and the best time to plant is in the autumn alike many fruit trees.
Raspberries freeze well so no problem if you have a more than plentiful crop!
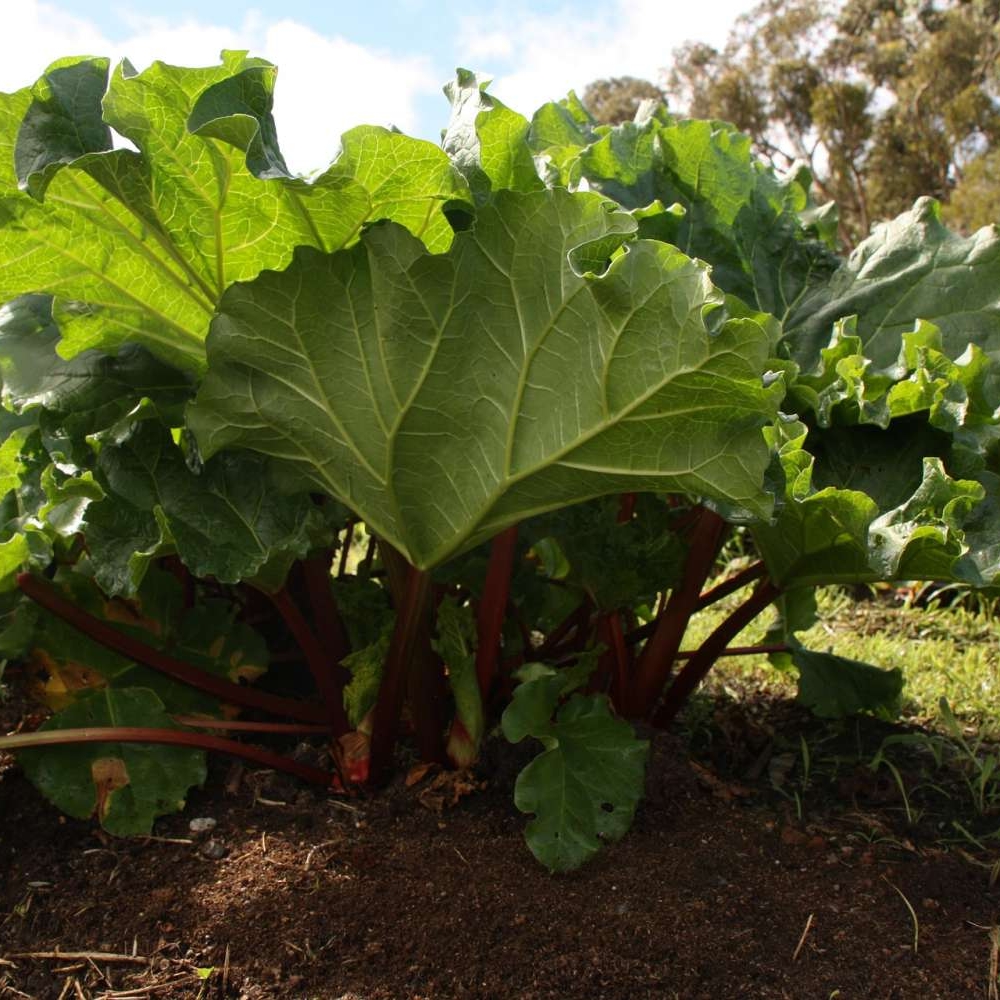
Rhubarb can be sown by seed but is mostly planted by using dormant crowns in between the autumn and spring. They like an open sunny place where it won't get water-logged and should be placed in well drained soil with just the tip of the crown poking above the soil.
The area should be kept weed-free and watered during dry spells. They will need leaving alone for the first season so not to weaken the plant and then only harvest a few stems during the second, gradually taking more the third season. In the autumn, remove the outer dead leaves to expose the crown, which will help it give you a more plentiful crop the following year.
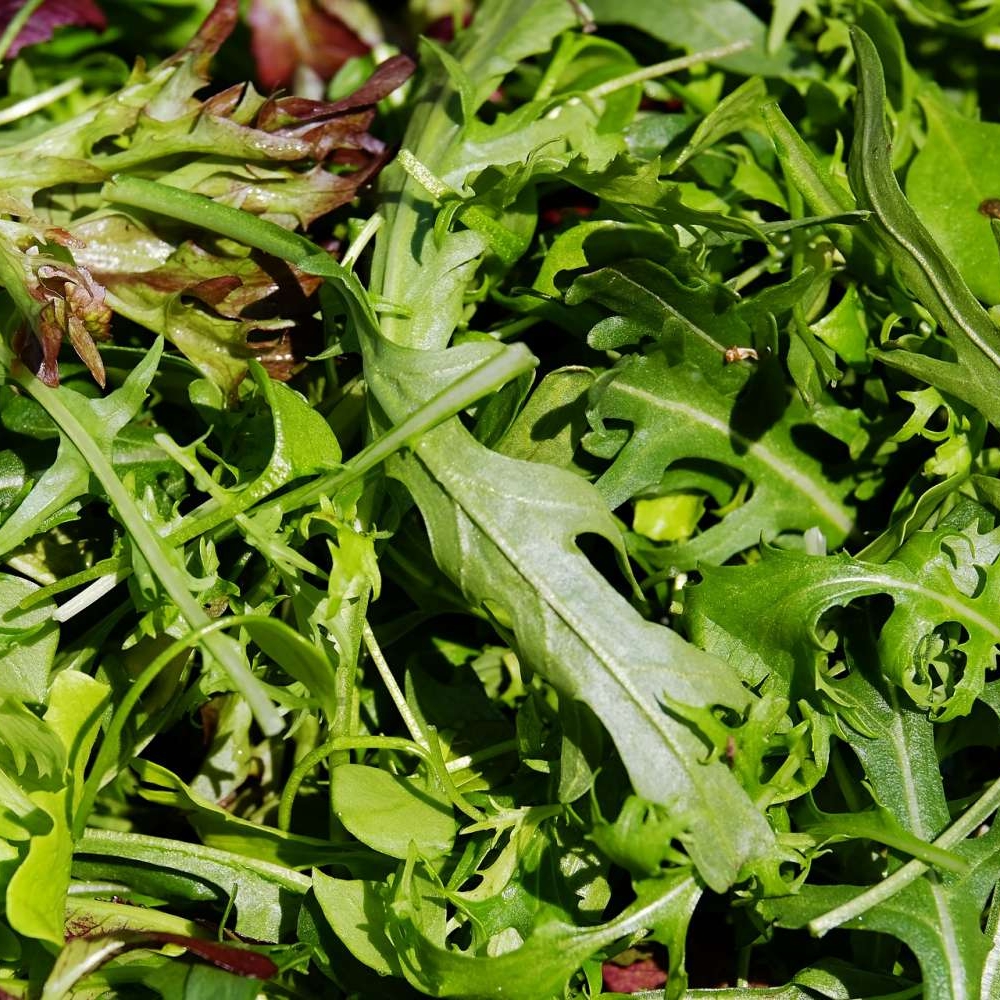
We love this peppery salad leaf and so glad we sowed a simple row of seeds a few years back. We planted directly in the soil, watered and kept weed-free; picking what we needed as and when, when the leaves were formed and big enough.
It was as simple as that, the rocket does run to seed and flowers and then looks rather woody and twiggy. We were tempted to dig it up and remove it but for whatever reason it got left in the ground and we're so glad we did.
Each year, during spring our rocket grows back, a bit bigger and better than the last with fresh leaves that seem to have a stronger taste of pepperiness each season. We also get the odd random sprig pop up here and there nearby.
We now have a mini hedge of rocket! You can follow more specific advice and take more care of your rocket but we have found this simplistic approach has worked wonders for us.
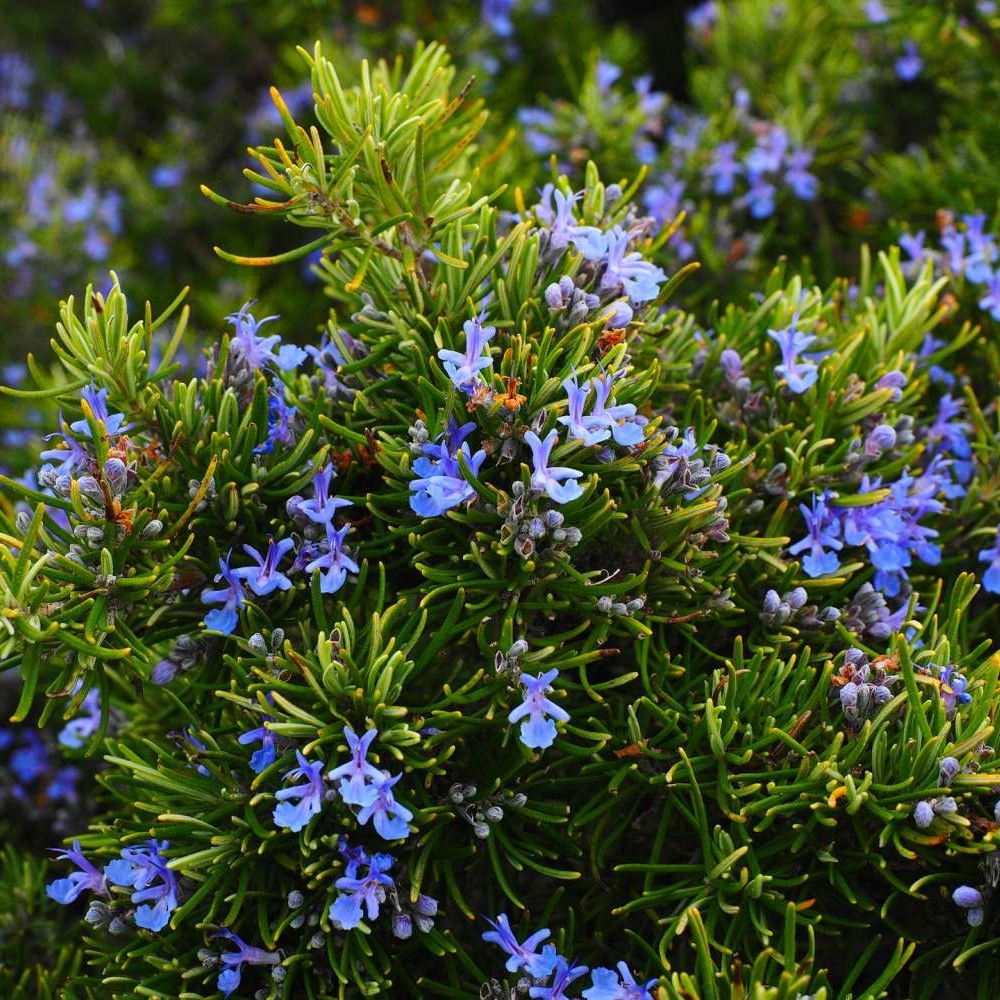
Herbs are attractive to grow and add aromatic scents to your plot. To grow in containers or raised beds can make life easier for picking and containing your herbs. Rosemary can be planted out in Spring - better from young plants than seed but you can do either.
They should be in well drained soil and watered during dry spells but not over-watered. Throughout the season you should be able to cut off as required with a plentiful crop. It may need some added protection against wet and frosts during the winter.

Herbs are attractive to grow and add aromatic scents to your plot. To grow in containers or raised beds can make life easier for picking and containing your herbs. Sage can be planted out in Spring - better from young plants than seed but you can do either.
They should be in well drained soil and watered during dry spells but not over-watered. Throughout the season you should be able to pick the leaves off as required with a plentiful crop. It may need some added protection against wet and frosts during the winter.
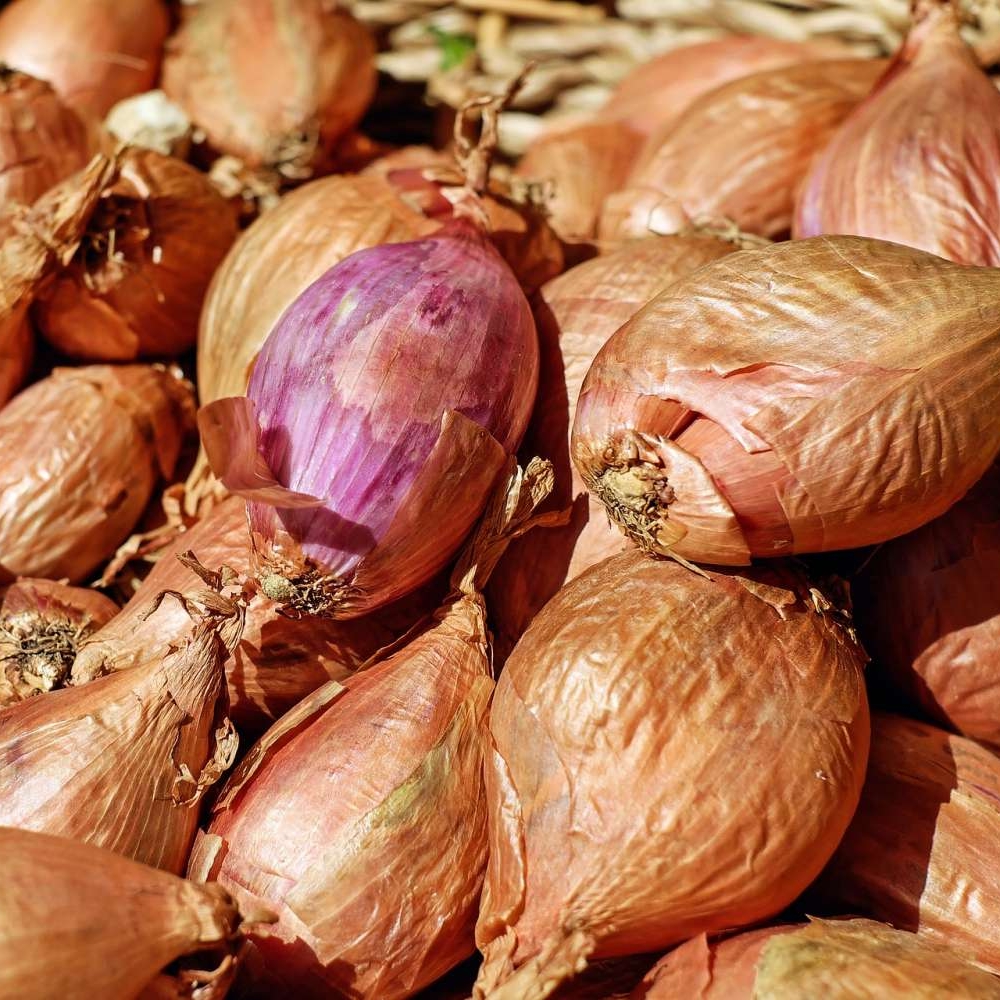
Shallots are very similar to growing onions being in the same plant family and are usually grown from sets as opposed to seeds. The same technique as onions is applied when sowing - roots downwards, they are pushed into the soil with just the tips peeking through. The area should be watered and weed-free.
Shallots sets are usually planted from November to March and when they're ready to harvest the following summer when the leaves have changed to yellow, they're ready to pull and separate. Shallots grow in cluster rather than individually like onions. It's worth netting them to prevent the birds from taking off with them too. Allow them to dry out as you would with onions.
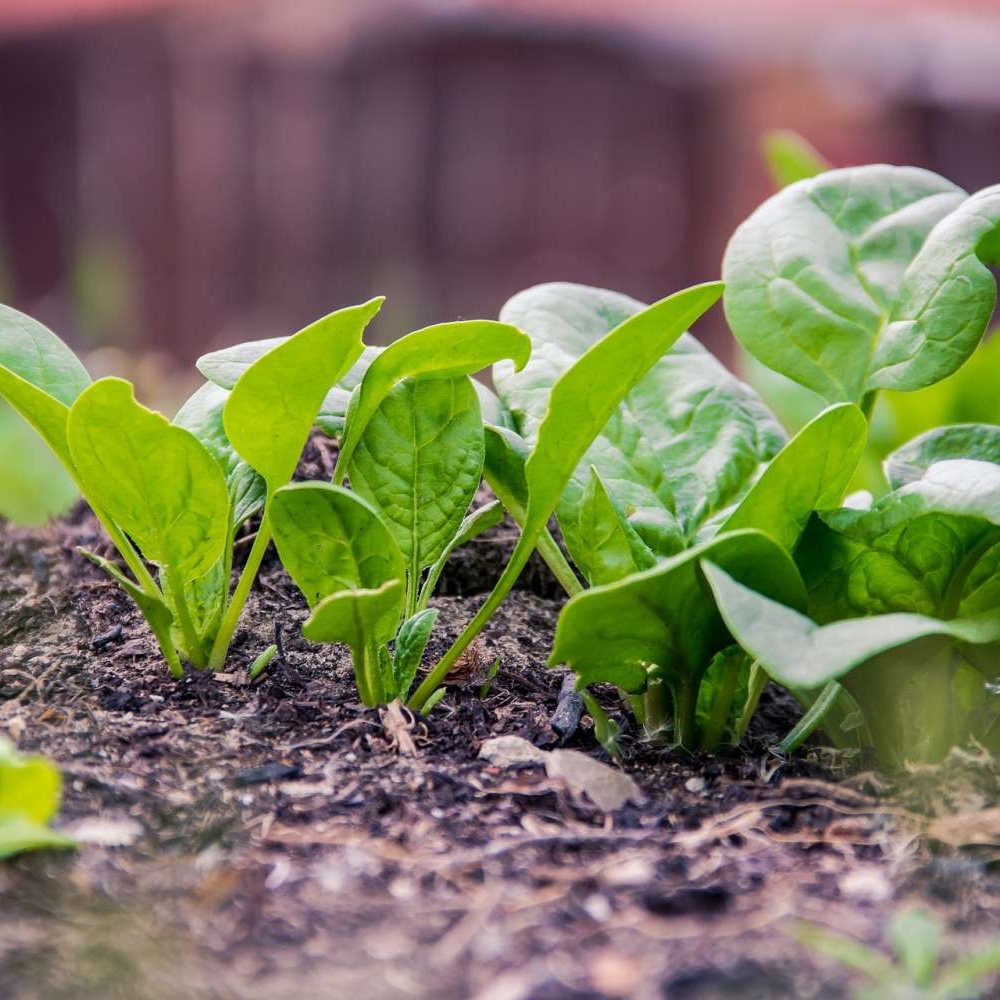
A great super-food to grow, easy and plentiful. You can sow your seeds as early as February indoors or directly in the ground from late March onwards.
Ensure your soil is rich with quality organic composting matter to avoid bitter tasting spinach later on. You can sow regularly throughout the spring for an ongoing supply and again late summer for a winter crop but they may need some added protection from the autumn and later.
You can thin out when the seedlings are established and again by harvesting every other plant at a time when they're ready.
Keep watered and weed-free and pick the leaves regularly as soon as they are ready to encourage re-growth. Your sowing timings may give you an all year round crop of spinach!
We find salad/spring onions very easy to grow and more often that not sow the seeds directly into the soil. You have quite a chunk of time that you can sow them as well for a good staggered supply; anytime from March/April onwards until autumn (or any time indoors).
They only need a fairly shallow bed - sow the seeds about 1cm deep and sow thinly in rows, stagger the sowing or sow in a timely manner for varying harvests and supply.
Obviously, they need to be weed-free and watered when dry but are pretty versatile in where they'll grow and soil type.
You can pull up pretty much as and when you want to use them, so that they don't go to waste and you can decide how big a bulb and stem depending on your preference and your use of them. Not only are they a great addition to salad but also give incredible flavour in cooking or as a garnish - yes we eat the inner green parts too!

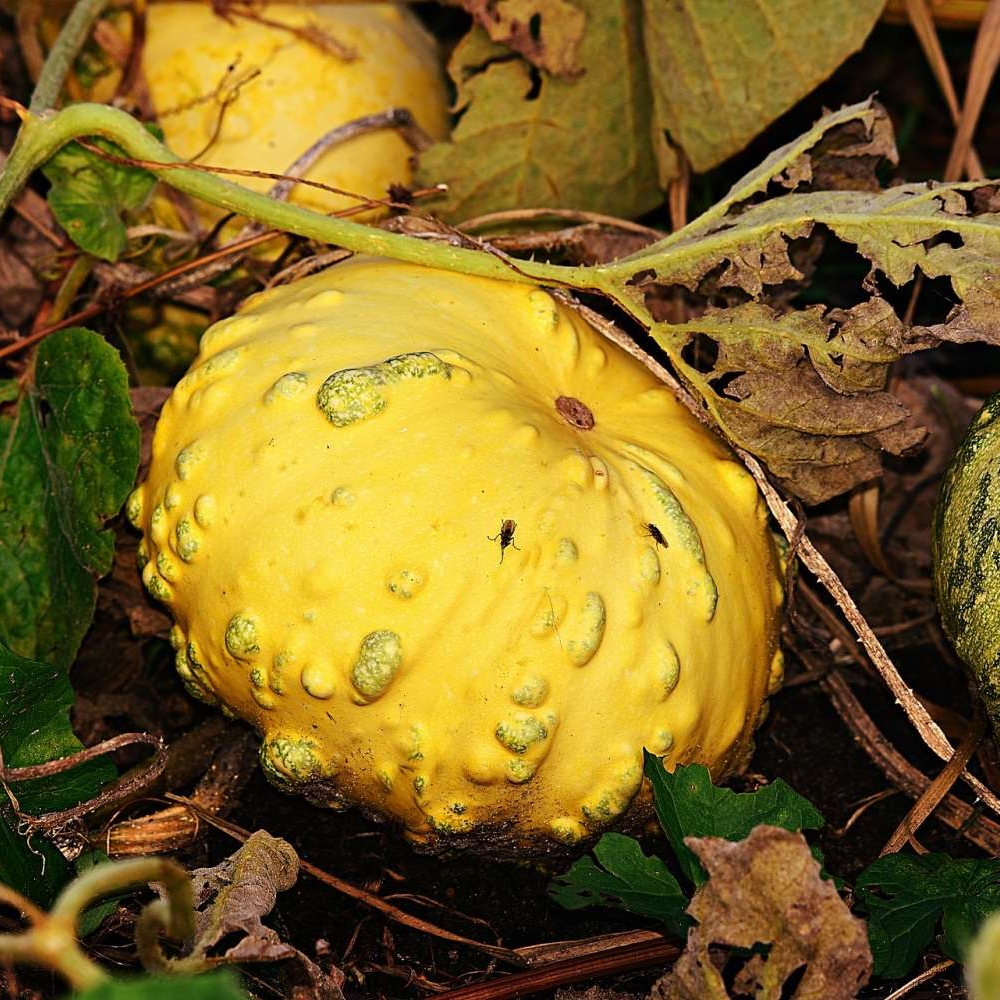
Squashes are in the same family as pumpkins and are similar to grow, you can sow seeds indoors during spring or plant seeds directly outside late May to early June.
The indoor seedlings will need hardening off before planting out. You will need to allow a fair amount of space for the foliage and squashes to grow and to keep the area weed-free and watered during dry weather. The squashes are a bit easier to manage than pumpkins; they generally don't need elevating from the soil but do take care when watering that the stems don't rot due to excess water sitting around them.
You can pick young squashes during the summer, for wintering squashes allow them to mature but harvest them before the frosts start.
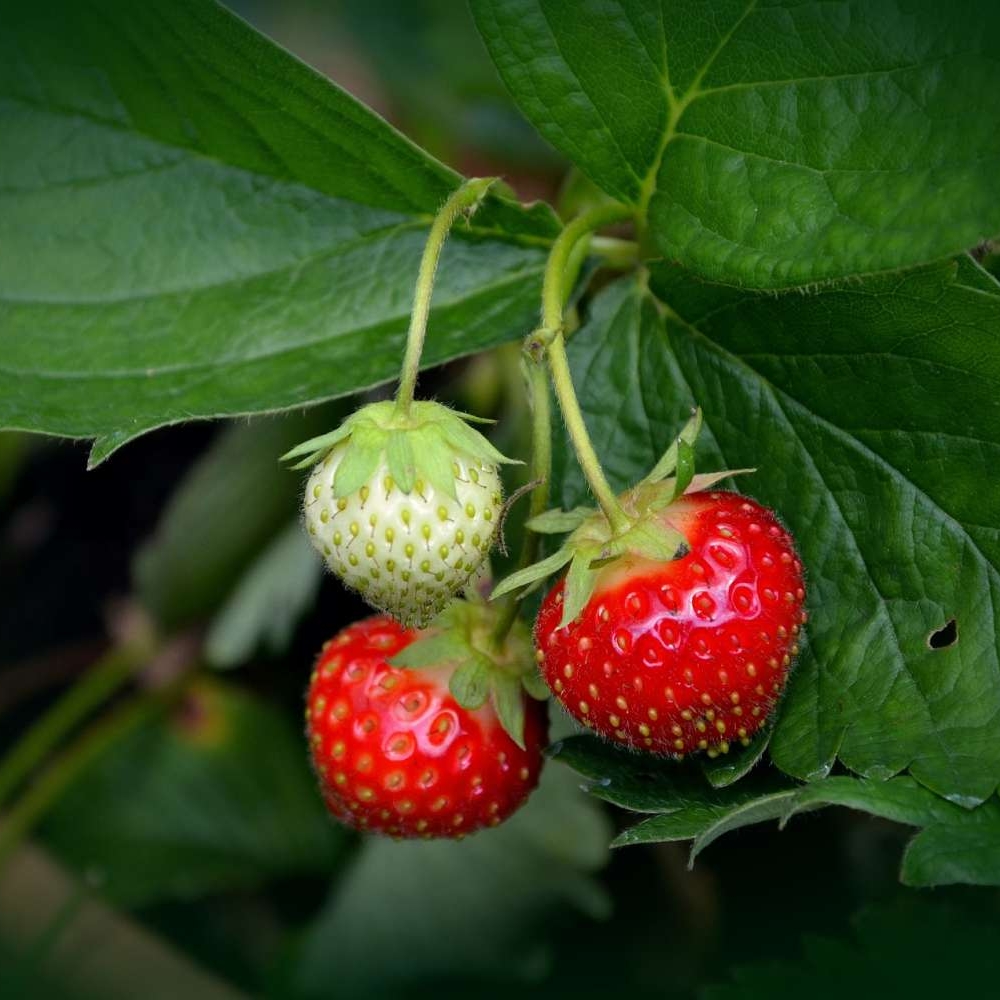
We usually opt to buy small plants from the garden centre and replant in the ground but they can be planted in pots and planters too. They like a sunny spot in well drained soil and dependent on variety we've had strawberries as late as November!
In wetter weather it pays to add some straw around the base to keep drier and so the fruit doesn't rot on the ground. Also keep the area weed-free.
You can add some tomato feed once your flowers start fruiting and be sure to pick regularly to promote re-growth - ours don't usually make it as far as home! You will need to check your type for specifics but don't expect to get a crop the first year or after a few years and you may also want to keep runners in check if you don't want them spreading too much.
Sugar snap peas are a variety of peas where the pod is edible, alike Mange Tout. Please see Peas.
Please see turnips.
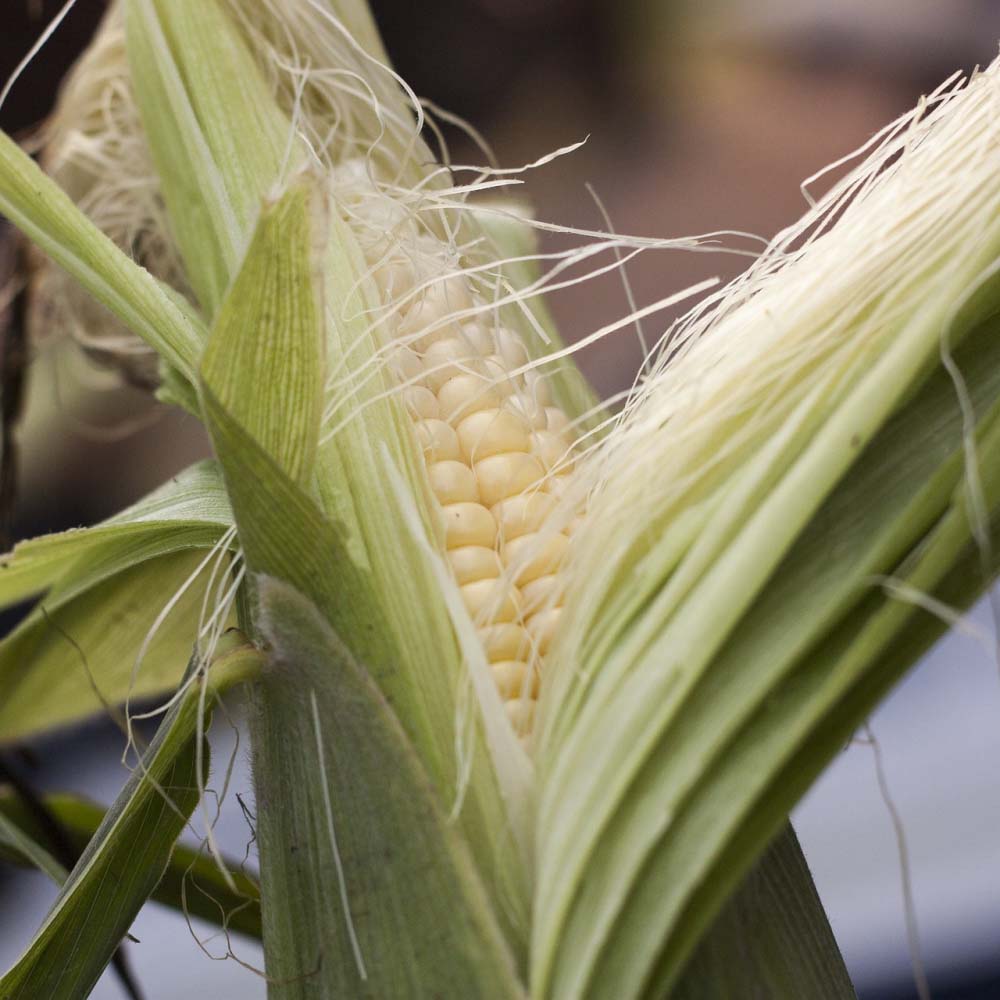
We tend to grow these from seeds in pots inside during Spring. Sweetcorn love the warmth and so we transfer them out late Spring/early summer when they're about 15-20cm high, using the larger, stronger ones. Instead of rows, plant in square blocks for example 4 x 4. This helps encourage their growth and pollination. Due to their height, they are vulnerable to strong winds also, therefore a square rather than a row will add protection. Keep watered in dry weather and the area weed-free. They will gain height and then flower at the tops and helped by the wind they will pollinate and the husks will begin to grow. The husks will have silky grass like tuffs and when these turn brown in colour, the husk should be ready to harvest. The kernels will have a milky residue when pressed.
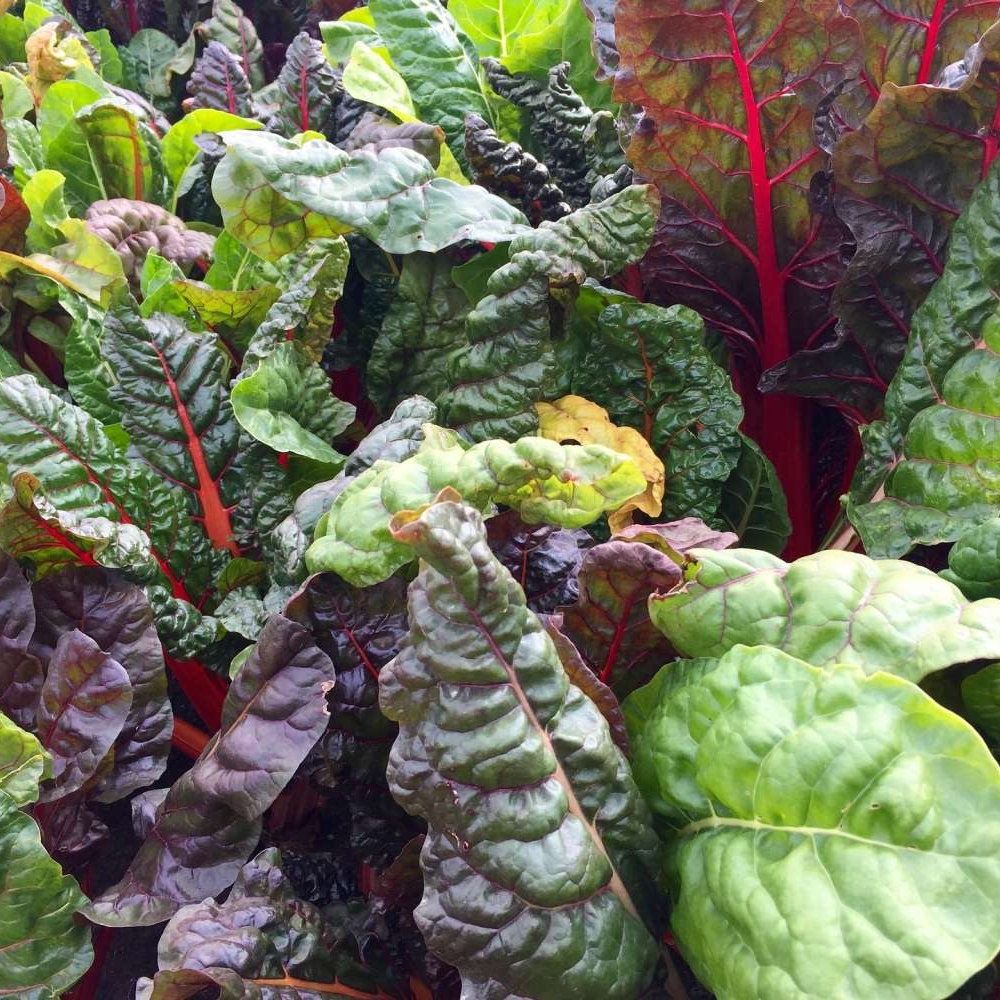
Sow directly into the soil outdoors during spring in an open, sunny spot with good draining soil. About an inch deep in rows, approx 4 inches apart. You can sow a second supply during the summer, which will re-grow leaves the following spring. Swiss Chard is easy to grow and is a very attractive and colourful addition to the plot!
Water well and keep weed-free; for over wintering chard you may want to add some protection like fleece or straw.
You can harvest regularly, just picking the leaves as required and this helps encourage re-growth. Small tender leaves are lovely and you can work your way into the centre. Try not to leave too long to pick or for the leaves to grow too big.
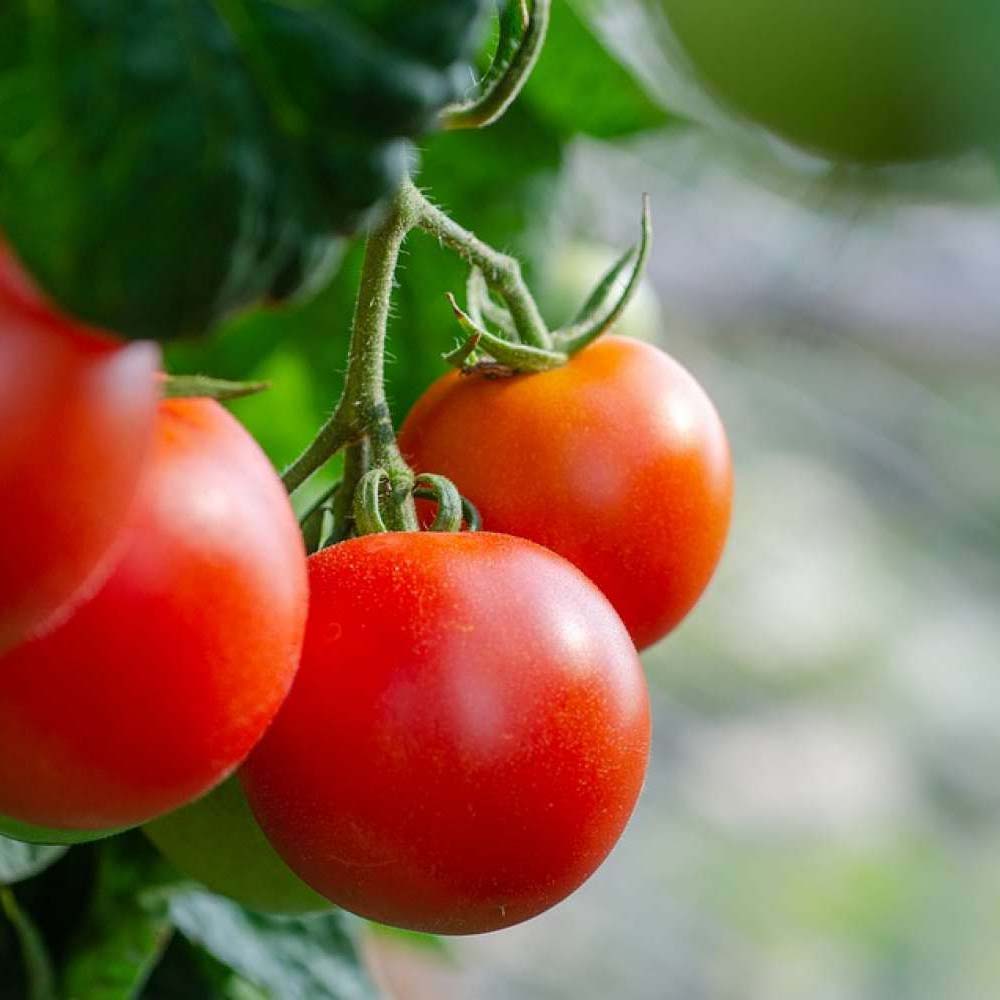
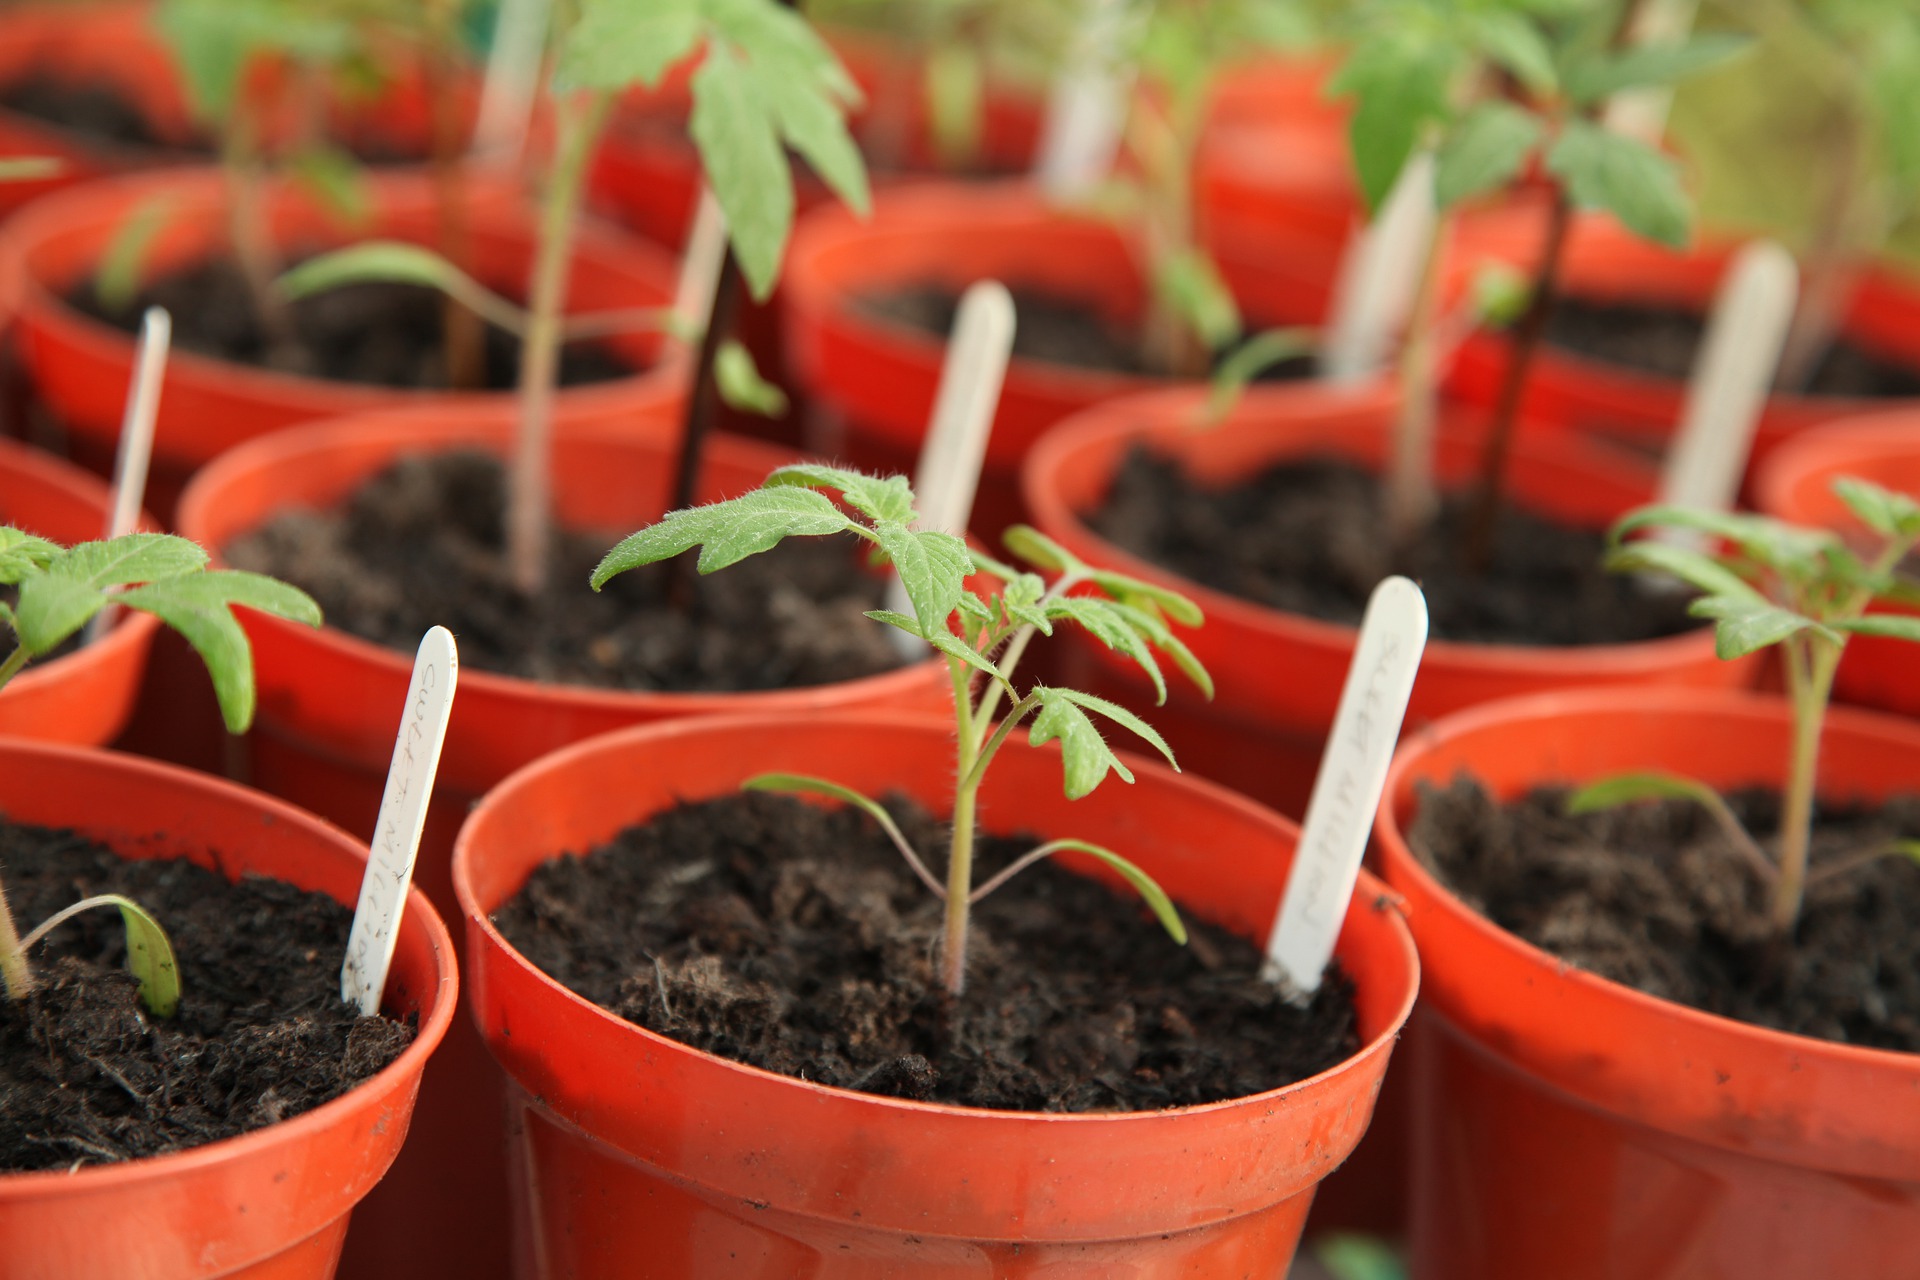
Tomato plants can be bought, however we tend to grow from seed. You can start sowing early in the year - January to March in small pots with rich compost and water. Cover the seeds with clingfilm or place in a propagator and look after them on a sunny windowsill until they are about 3inches tall and pretty established before transferring to bigger pots.
Start to move them outside once the threat of frosts have gone and the weather is warmer; preferably in a sunny spot or in a greenhouse.
As the plants grow bigger, it's an idea to pinch out your plants (remove side shoots) so that all the nutrients are not wasted. Once you have flowers appear (yellow) it's well worth offering your tomato plants some tomato feed once a week along with regular watering - tomato plants can be thirsty and should have consistent watering, not allowing the soil to dry out and to prevent the skins splitting. Remove surplus leaves to allow sunlight through to ripen your tomatoes once you have fruits starting to grow.
Once the plants become laden with heavy fruit, they may need support; we tend to have canes in place as the plants grow bigger before it's too late!
By late summer you should be regularly harvesting juicy ripened tomatoes with an ongoing supply. However, if you are left with fully formed unripened tomatoes at the end of the season, heading into autumn when the temperatures drop and the sun is weaker - you may want to take the plants back inside or harvest the green tomatoes to be stored where they may ripen.
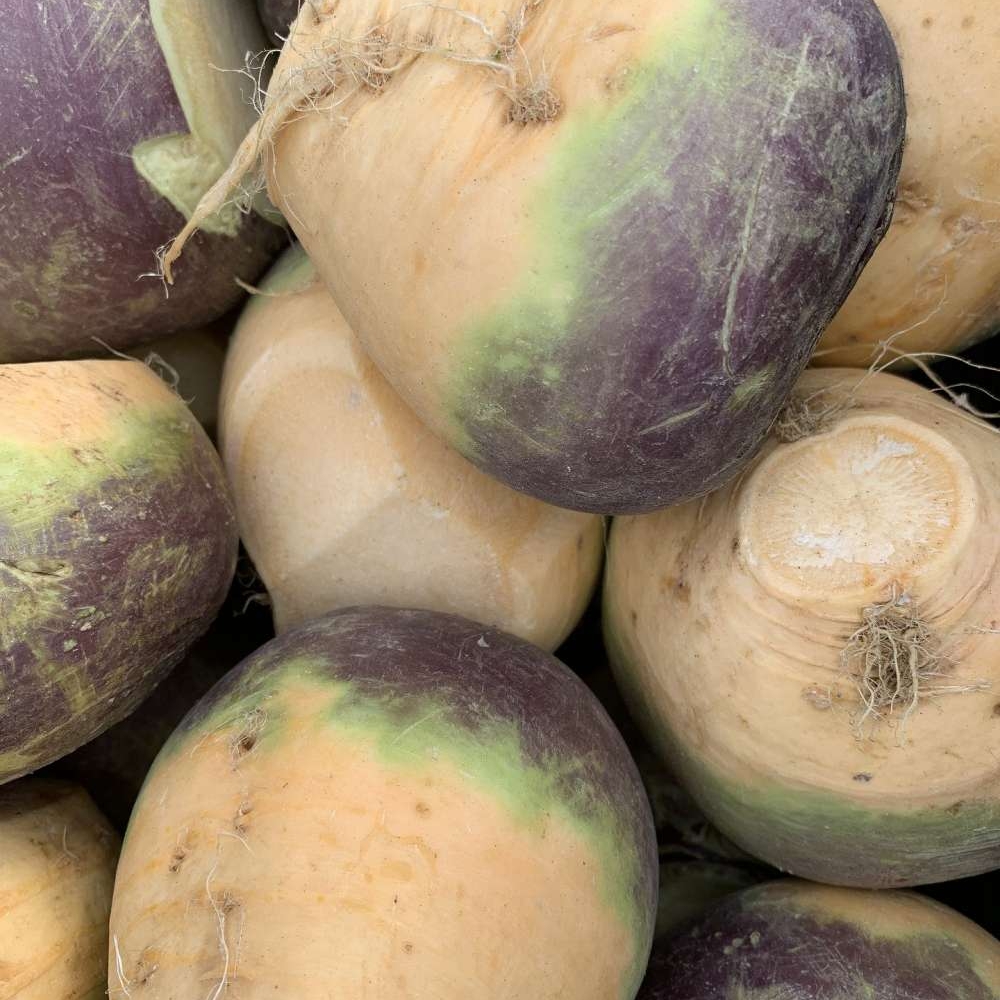
You can sow swedish turnip seeds directly into the ground from May-June onwards. They like a well composted manured soil in an open space. Allow room for growth by sowing approx 15cm apart and approx an inch deep; you may need to thin out your seedlings once they've become established.
Like any seedling, keep watered in dry weather and weed-free.
They are a slow to mature vegetable and won't be ready for a good 6 months or thereabouts; and in our opinion better after some good frosts. You can harvest during the autumn of course if you like smaller ones but we find they're best left until November-December time.
Please see courgettes.
Please always check the instructions on your seed packets as varieties can vary. Your location, the weather, soil condition and other factors can also determine failure or success, which need to be considered.
Our how to grow guide is a basic beginner's 'go-to' based on our own experiences. Many use a range of methods that may differ to ours. It's amazing what tips and tricks you can learn from 'veteran' growers once you make acquaintance with your neighbouring plots!